# Self-Deployment Guide
### Self Deploy and integrate it with your existing orchestrator
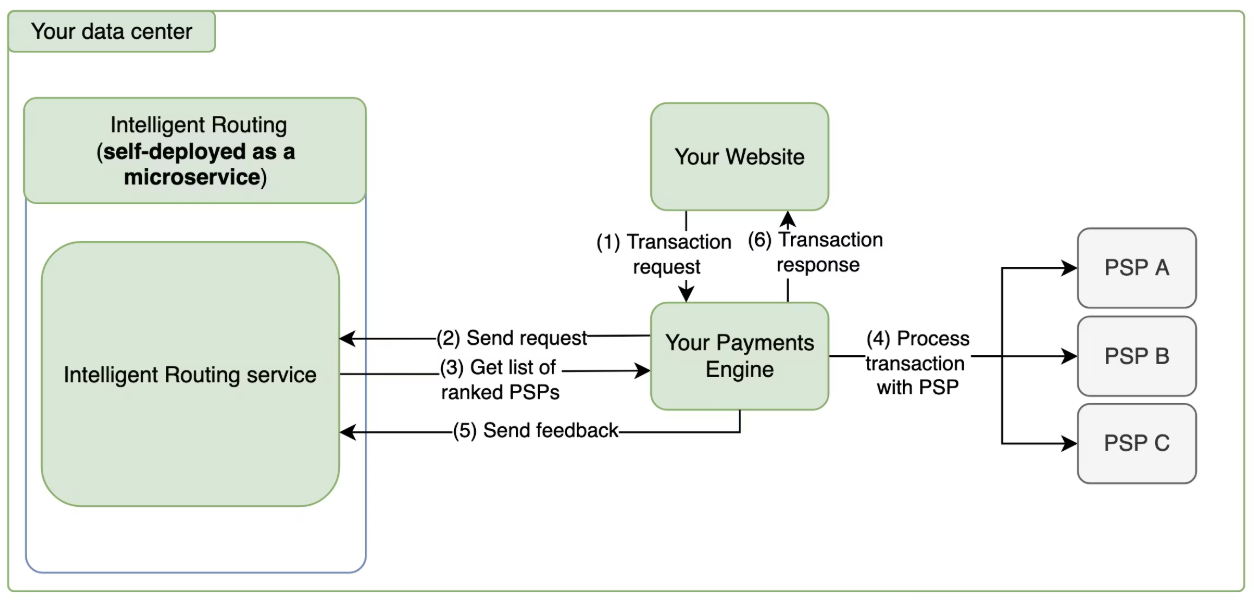
How it fits into your existing payments setup:
#### 1. Clone the Repository
```
git clone https://github.com/juspay/decision-engine.git
cd decision-engine
```
#### 2. Install Docker
```
Make sure Docker is installed on your system.
You can download and install Docker Desktop from the below links.
- Mac - https://docs.docker.com/desktop/setup/install/mac-install/
- Windows - https://docs.docker.com/desktop/setup/install/windows-install/
- Linux - https://docs.docker.com/desktop/setup/install/linux/
```
#### 3. Run the Project
**a. First-Time Setup**
If you're setting up the environment for the first time, run:
make init
This command performs the following under the hood:
```
docker-compose run --rm db-migrator && docker-compose up open-router
```
This will:
* Set up the environment
* Set up the database with the required schema
* Sets up redis and the server for running the application
* Push the configs defined in the config.yaml & the static rules defined for routing in priority\_logic.txt to the DB
#### b. Start the Server (without resetting DB)
If the DB schema is already set up and you don't want to reset the DB, use:
```
make run
```
**System Requirements:** Approximately 2GB of disk space
After successful setup, the server will start running.
#### Once the server is setup, you can refer to the [API reference](https://github.com/juspay/decision-engine/blob/main/docs/api-reference1.md) for usage