> For the complete documentation index, see [llms.txt](https://docs.hyperswitch.io/llms.txt). Markdown versions of documentation pages are available by appending `.md` to page URLs; this page is available as [Markdown](https://docs.hyperswitch.io/integration-guide/account-management/multiple-accounts-and-profiles/quick-start.md).
# Quick Start: Create Your Hyperswitch Account
Sign up to Hyperswitch, generate your first API key, and connect a payment processor.
Hyperswitch's Control Centre is the dashboard you and your team use to manage payments end to end: connecting payment processors, configuring routing, viewing analytics, handling refunds and disputes, managing your team and access roles, and exposing programmatic access through API keys. This page walks you through the first-time setup.
***
### 1. Sign Up to the Control Centre
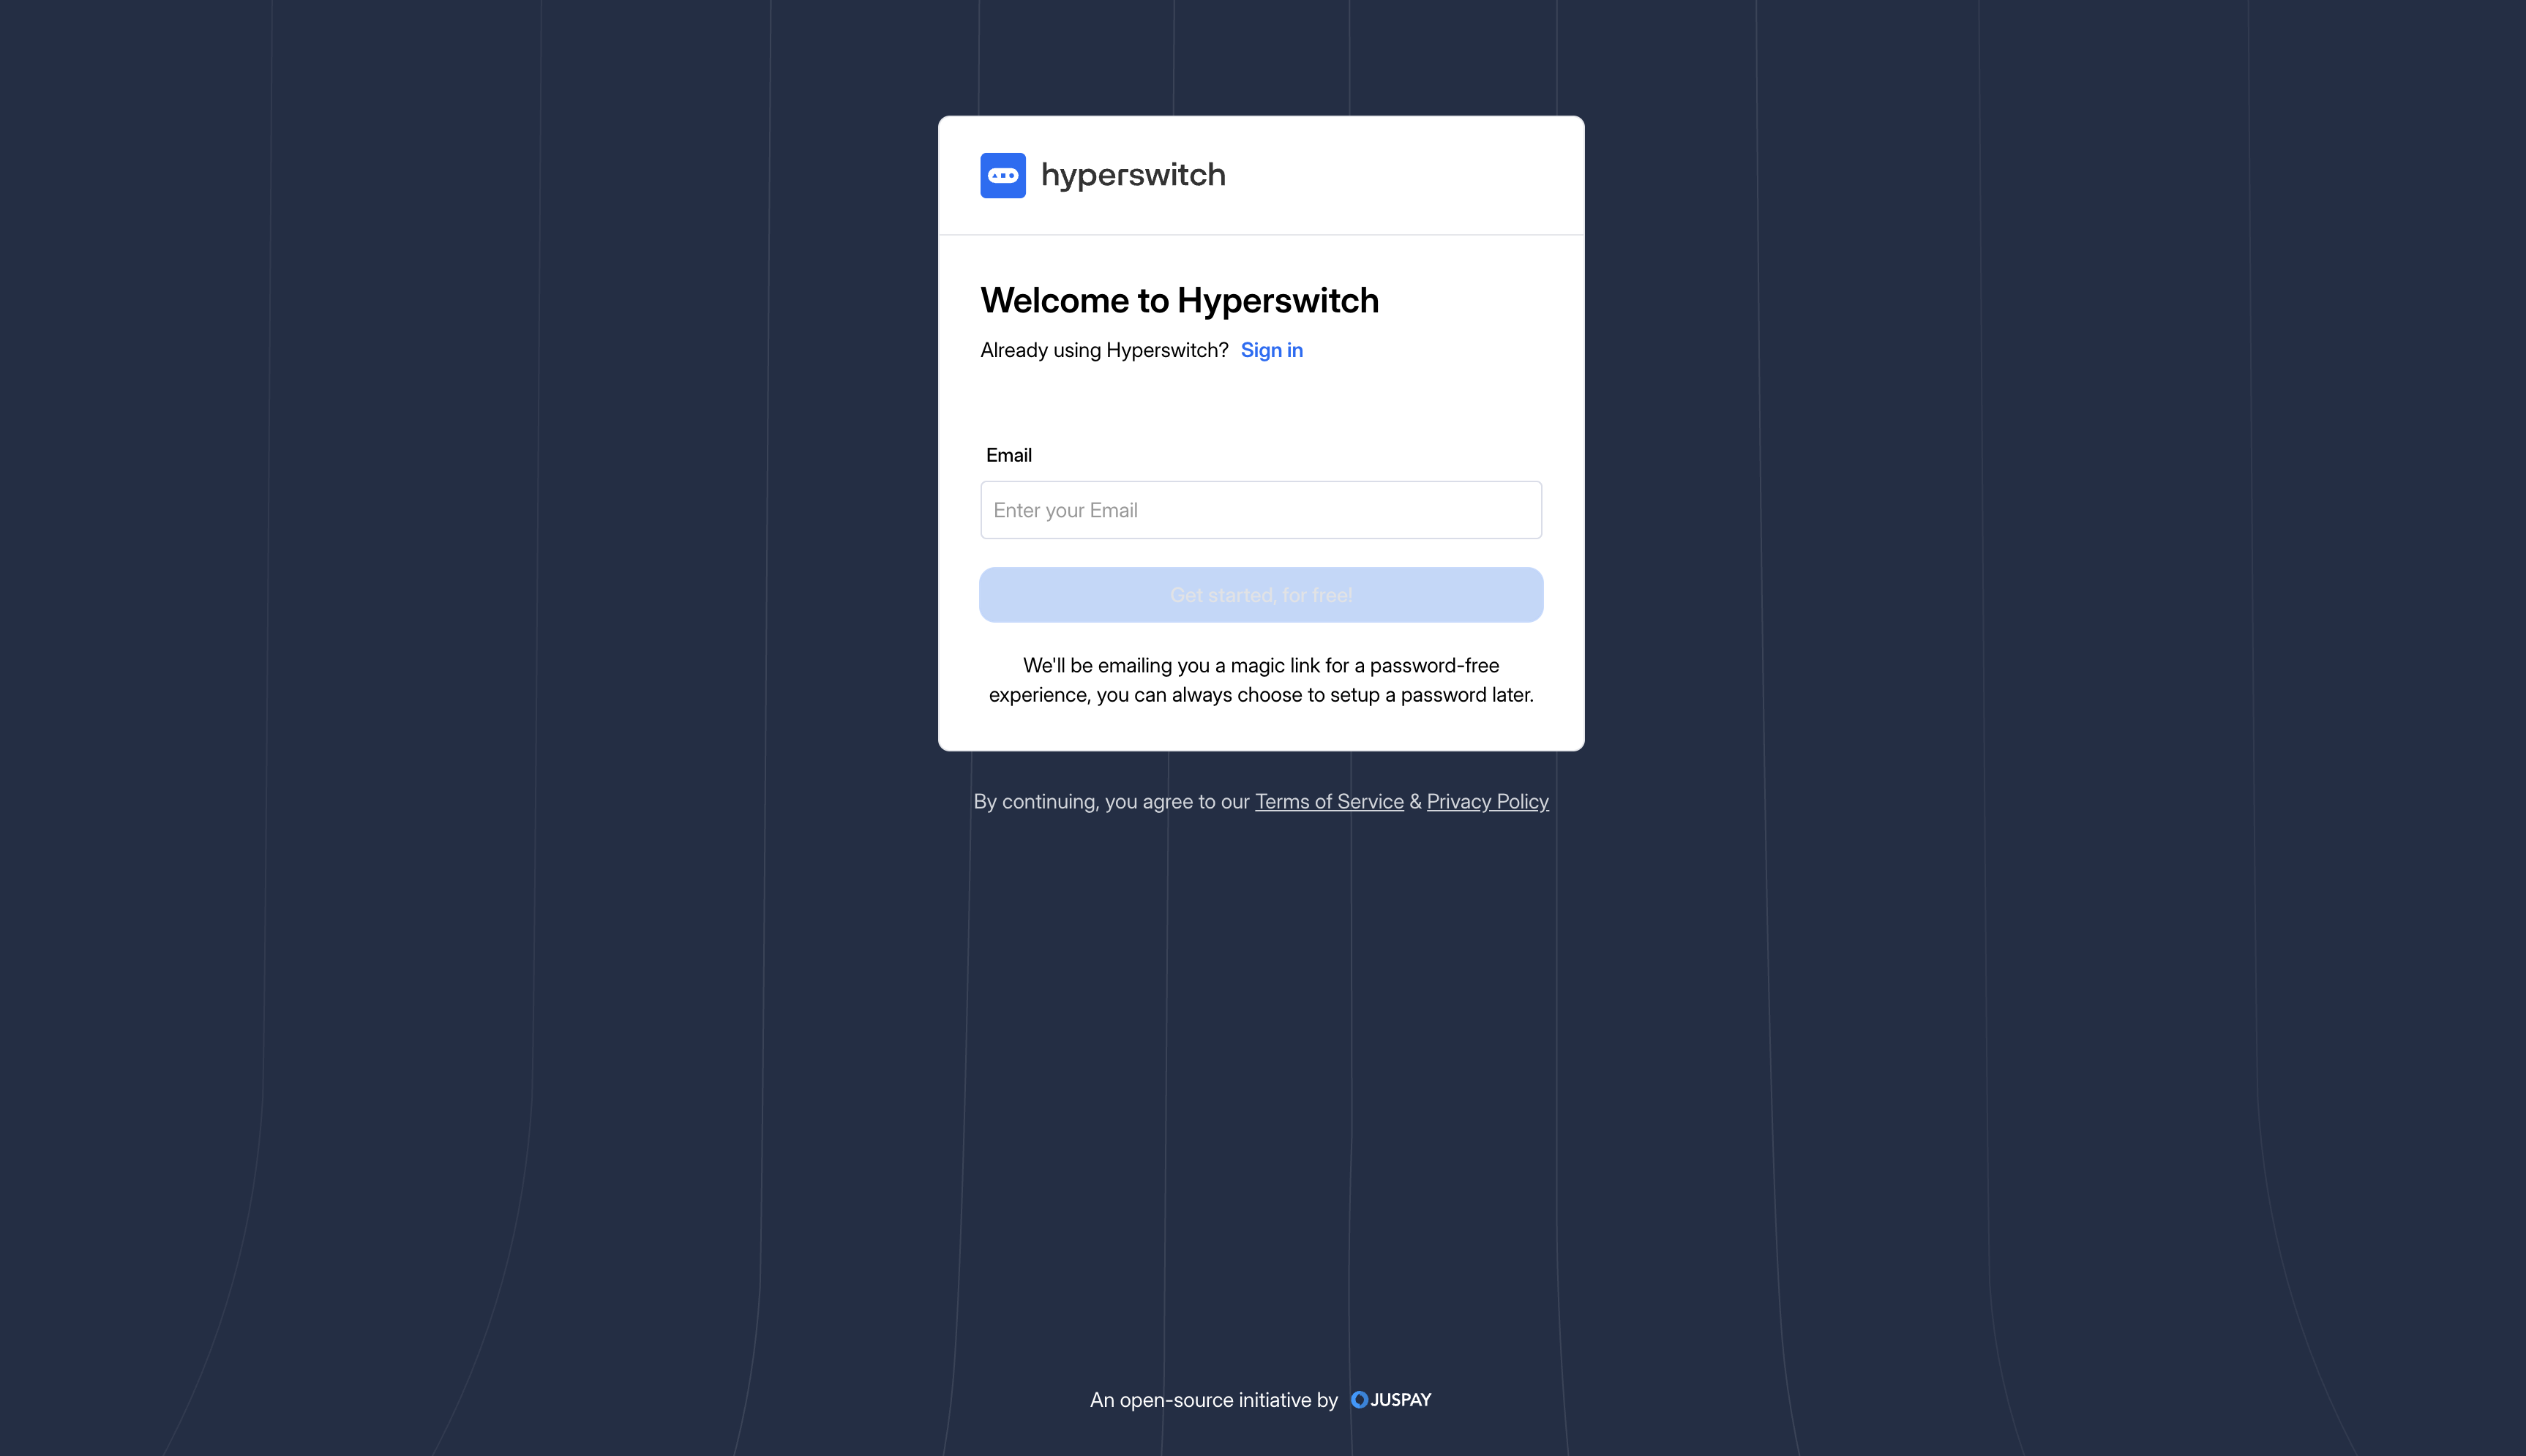
Navigate to [app.hyperswitch.io](https://app.hyperswitch.io) and click **Sign Up**. Enter your email and set a strong password, then submit.
Sign-up creates a user with the email you provided. By default, an Organization is created for you with one Merchant Account and one Profile already in place. Your user is assigned the **Organization Admin** role, so you can invite teammates and grant them roles as needed.
Hyperswitch sign-up screen
To open your profile details later, click your email at the bottom of the left navigation bar.
***
### 2. Tour the Dashboard
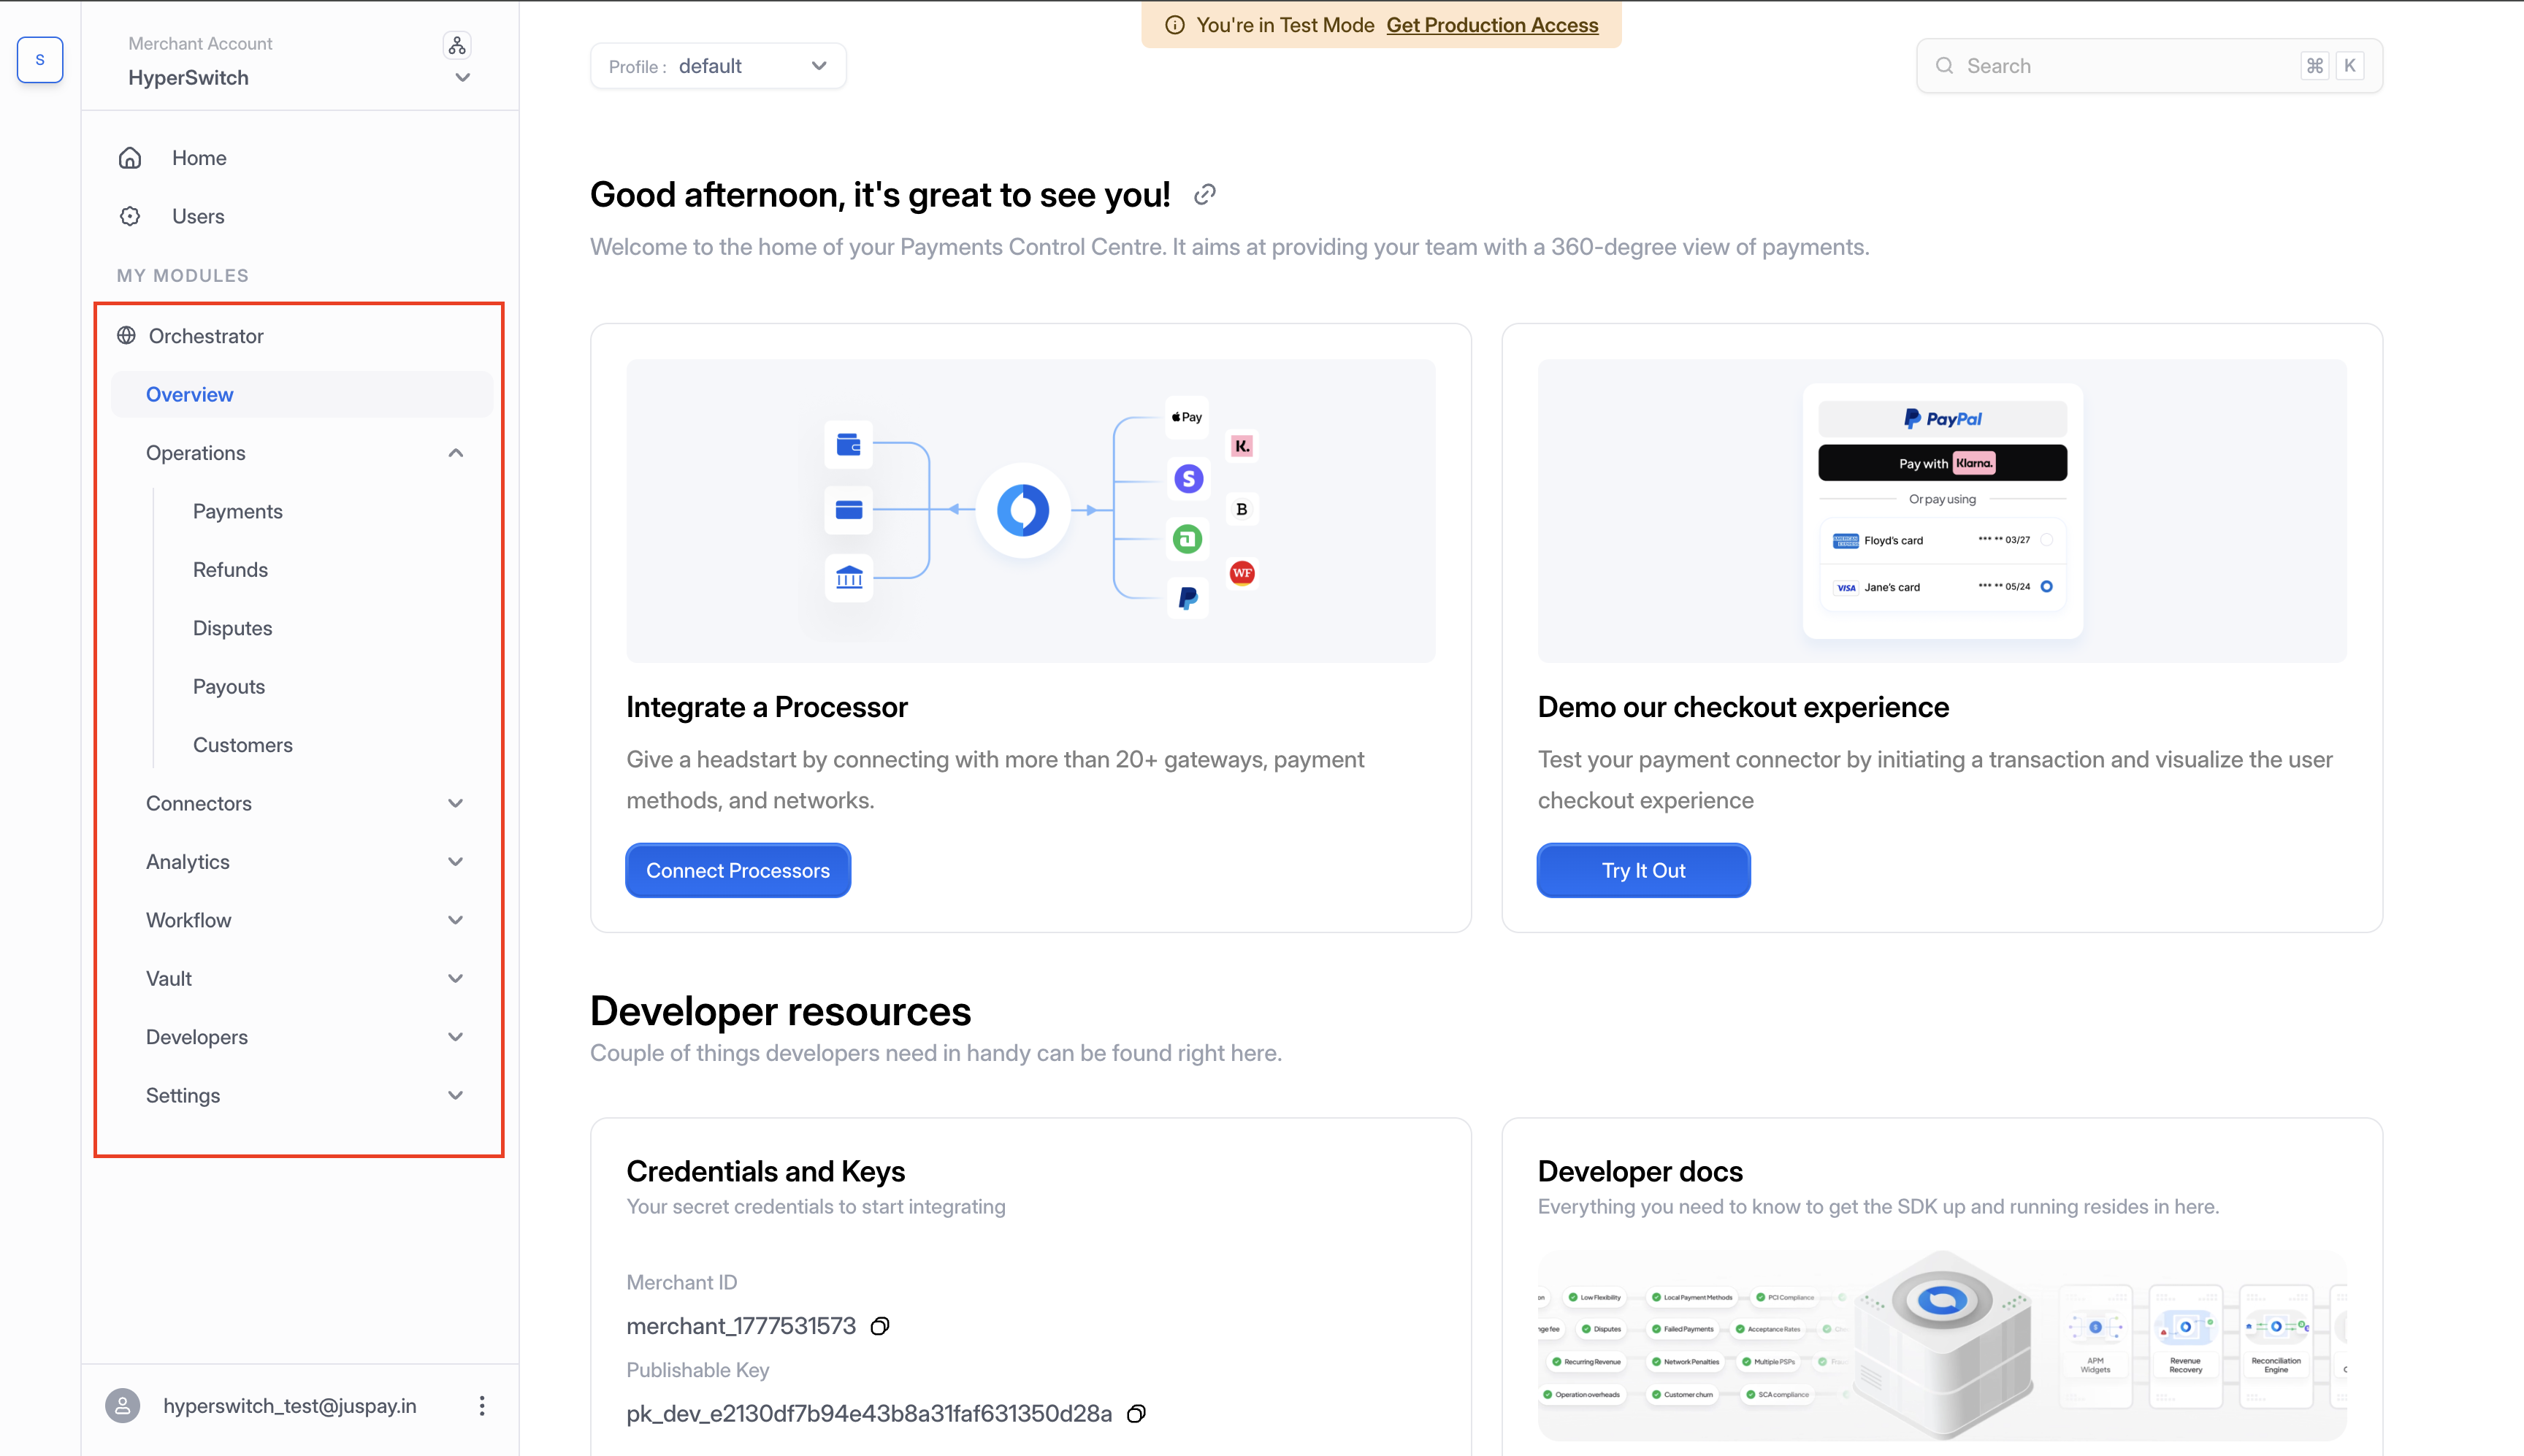
After sign-up, you land on the dashboard home. Familiarise yourself with these areas in the left navigation:
* **Payments**, **Refunds**, **Disputes**: list and manage transactions.
* **Connectors**: add and configure payment processors.
* **Workflow**: configure routing, retries, and surcharge.
* **Developers**: API keys, webhooks, events.
* **Settings**: organization, merchant, and profile configuration.
* **Analytics**: real-time dashboards for payments, refunds, and smart retries.
Dashboard home screen with the main navigation sections highlighted in the sidebar
***
### 3. Create Your First API Key
{% hint style="info" %}
Before creating an API key, ensure you have access to the credentials of the payment processor you plan to connect (API key, secret, webhook configuration).
{% endhint %}
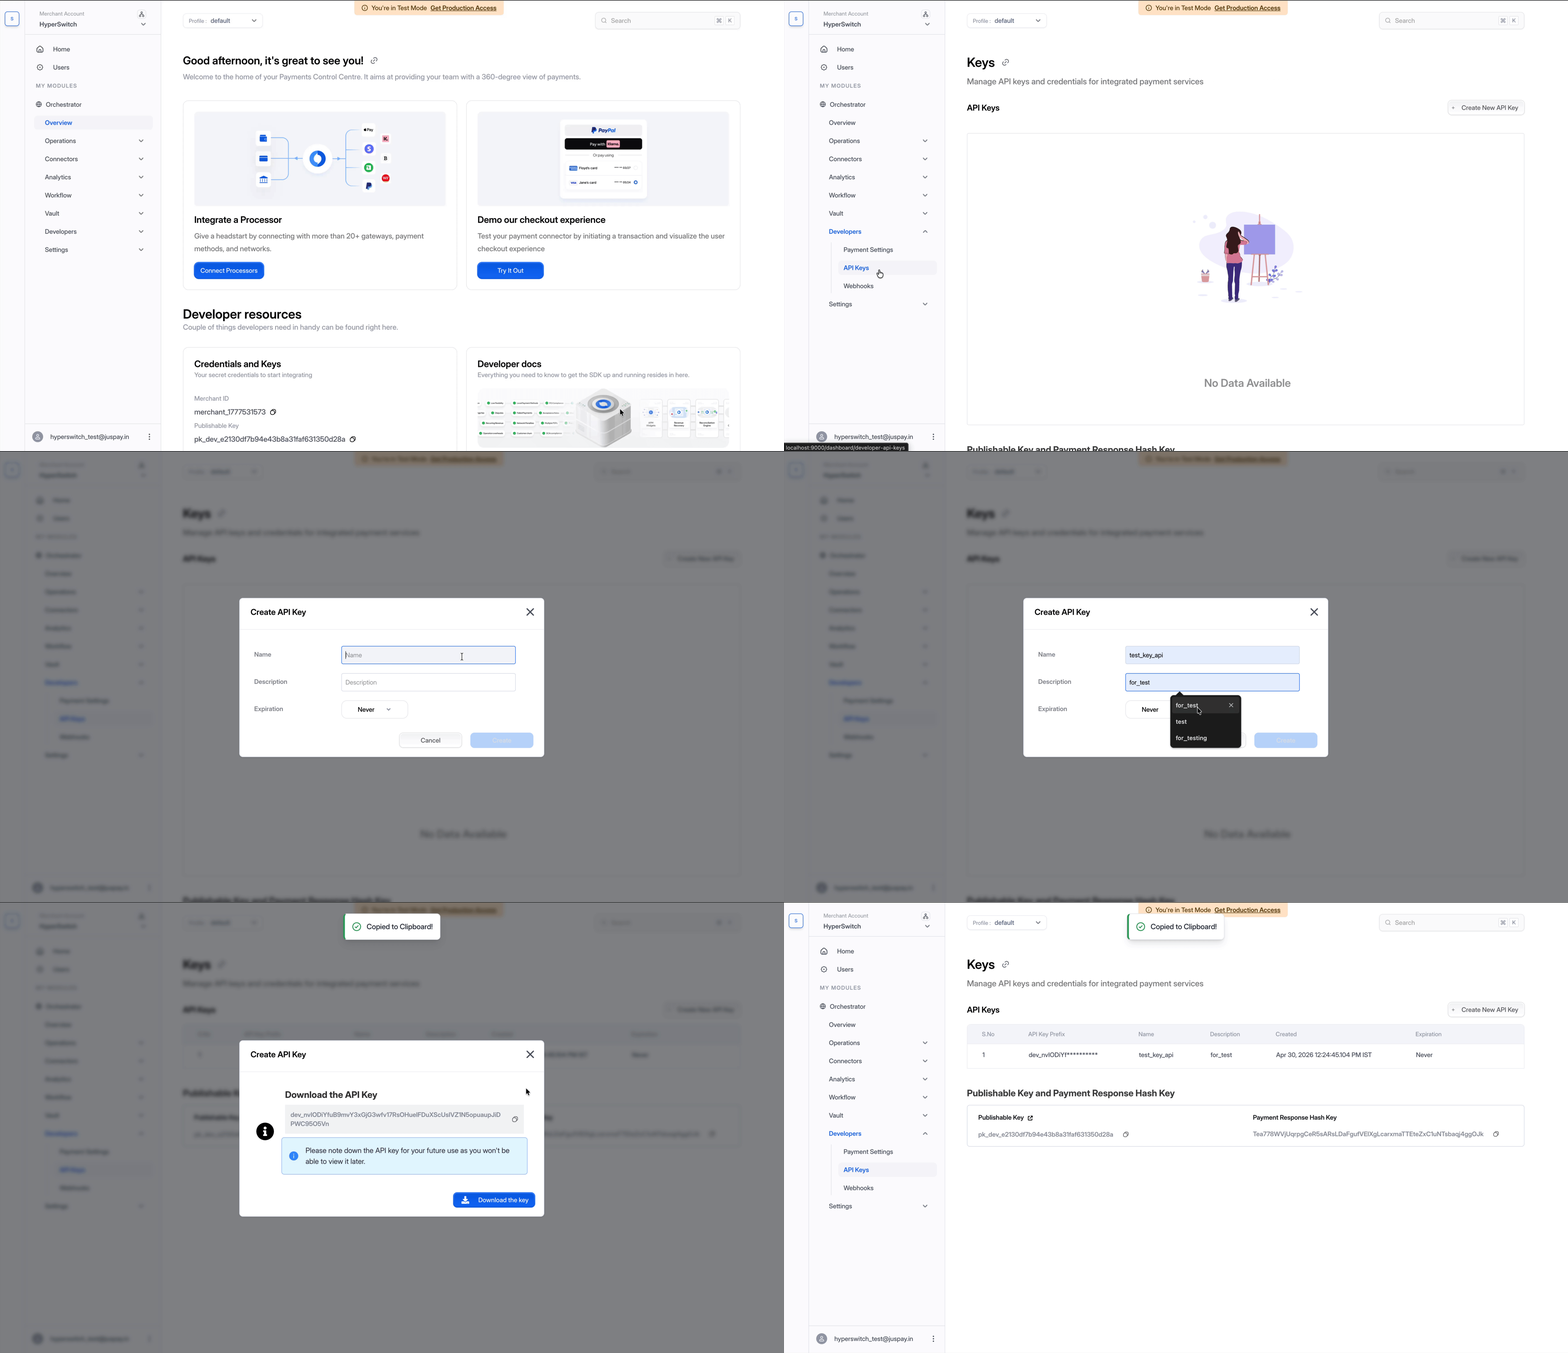
From the left navigation bar, go to **Developers** then **Keys**, and click **Create API Key**.
Creating an API key from the Developers section
Fill in:
* **Description**: a short label for the key (e.g. "Server-side payments").
* **Validity**: how long the key remains active.
Click **Next**. The key is generated, shown once, and offered for download.
{% hint style="warning" %}
The API key is shown **only once** for security reasons. Download or copy it before closing the dialog. If you lose it, create a new one.
{% endhint %}
You can use the dashboard later to reveal the publishable key, revoke keys, or create new secret keys at any time. If you're integrating Hyperswitch through a third-party platform, switch to live mode to get production-ready API keys before processing real payments.
***
### 4. Connect a Payment Processor
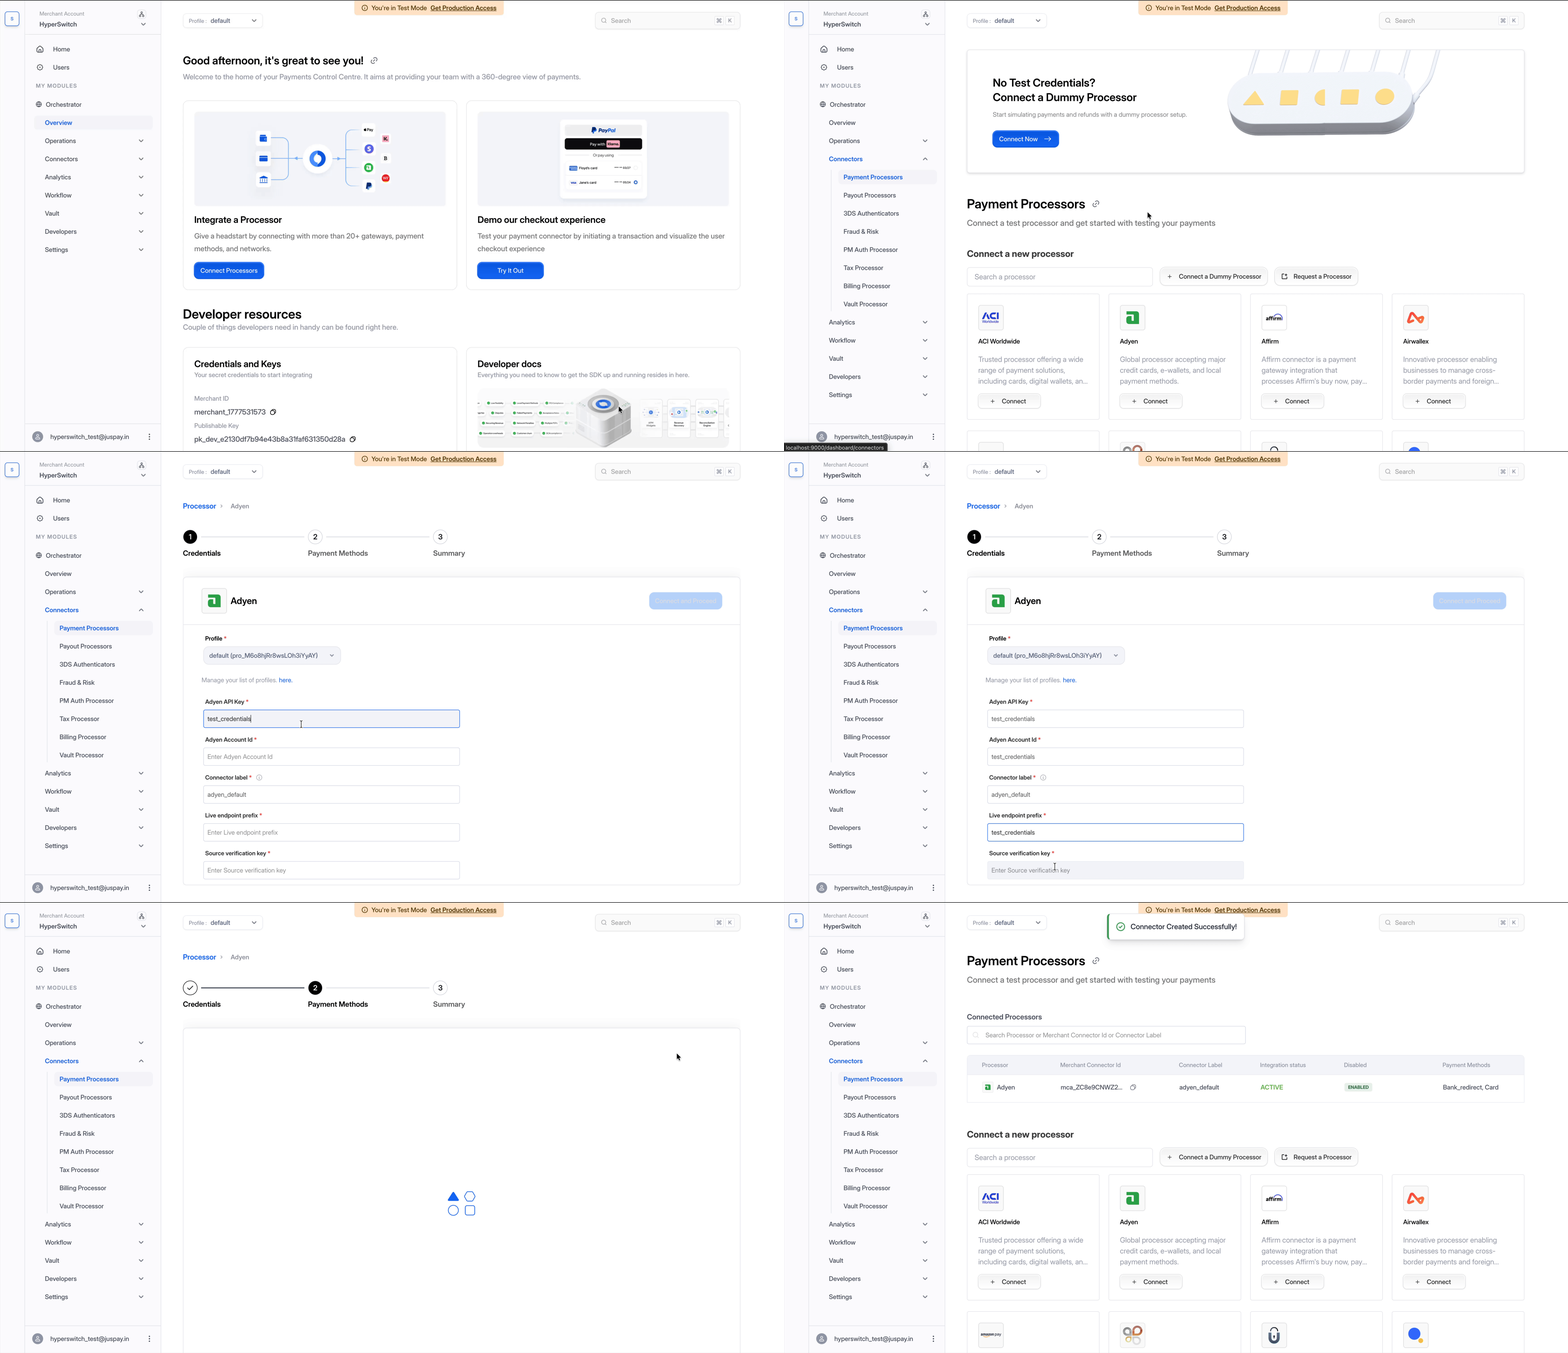
From the left navigation, go to **Connectors**. You'll see all processors integrated with Hyperswitch. Click the one you want to connect.
Connecting a payment processor from the Connectors section
To connect a processor:
1. Provide the processor's API key, secret, and any other credentials it requires (these vary by processor).
2. In the processor's own dashboard, configure the Hyperswitch endpoint to receive webhooks.
3. Choose which payment methods (cards, wallets, BNPL, etc.) to enable for this processor.
4. Review the configuration and confirm.
***
### 5. Make a Payment
With your API key in hand and a processor connected, run your first payment using the Payments Create API.
* API: [Payments Create](https://api-reference.hyperswitch.io/v1/payments/payments--create) (`POST /v1/payments`)
Pass your merchant API key in the request and Hyperswitch will route the payment based on the routing configuration of the matching profile. By default, priority-based routing is enabled, ordered by the time each processor was connected, and acts as your fallback if no other rule matches. You can configure volume-based or rule-based routing later from **Workflow** then **Routing**.
For deeper routing options, see the [Smart Router](/other-features/payment-orchestration/smart-router.md) docs.
***
### What's Next
* Decide on the right account structure for your business: [Pick the Right Setup for Your Business](/integration-guide/account-management/multiple-accounts-and-profiles/pick-the-right-setup.md).
* Understand the three-level hierarchy: [Organization, Merchant Account, and Business Profile](/integration-guide/account-management/multiple-accounts-and-profiles/hyperswitch-account-structure.md).
* If you're operating a marketplace, VSaaS, or onboarding sub-merchants: [Platform Organization](/integration-guide/account-management/multiple-accounts-and-profiles/platform-organization-concepts.md).
---
# Agent Instructions
This documentation is published with GitBook. GitBook is the documentation platform designed so that both humans and AI agents can read, navigate, and reason over technical content effectively. Learn more at gitbook.com.
## Querying This Documentation
If you need additional information that is not directly available in this page, you can query the documentation by asking a question.
Perform an HTTP GET request on the following URL with the `ask` and `goal` query parameters:
```
GET https://docs.hyperswitch.io/integration-guide/account-management/multiple-accounts-and-profiles/quick-start.md?ask=&goal=
```
`ask` is the immediate question: it should be specific, self-contained, and written in natural language.
`goal` is what the user is ultimately trying to achieve, the reason they need the answer. Sharing it helps GitBook give you a better, more relevant answer. A goal is most helpful when it describes the outcome the user wants rather than restating the question. For example, with `ask=how do I create an API token`, a goal like `automate deployments from our CI pipeline` lets GitBook tailor the answer to that use case.
The response will contain a direct answer to the question and relevant excerpts and sources from the documentation.
Use this mechanism when the answer is not explicitly present in the current page, you need clarification or additional context, or you want to retrieve related documentation sections.