Setting Up a Platform Organization

Create a Platform Organization and add Connected Merchants from the Dashboard

A Platform Organization allows you to manage multiple connected merchants and enable platform-level features. This guide walks you through creating a Platform Organization and adding Connected and Standard Merchants using the Payments Control Centre dashboard.

When you sign up on Hyperswitch, a Standard Organization is created by default with one merchant account. The signed-up user is assigned the Org Admin role. Org Admin access is required to create a Platform Organization. When a Platform Organization is created, a Platform Merchant is automatically created by default as the privileged parent merchant for the organization. There can only be one Platform Merchant per Platform Organization - you cannot create another Platform Merchant.

Create a Platform Organization

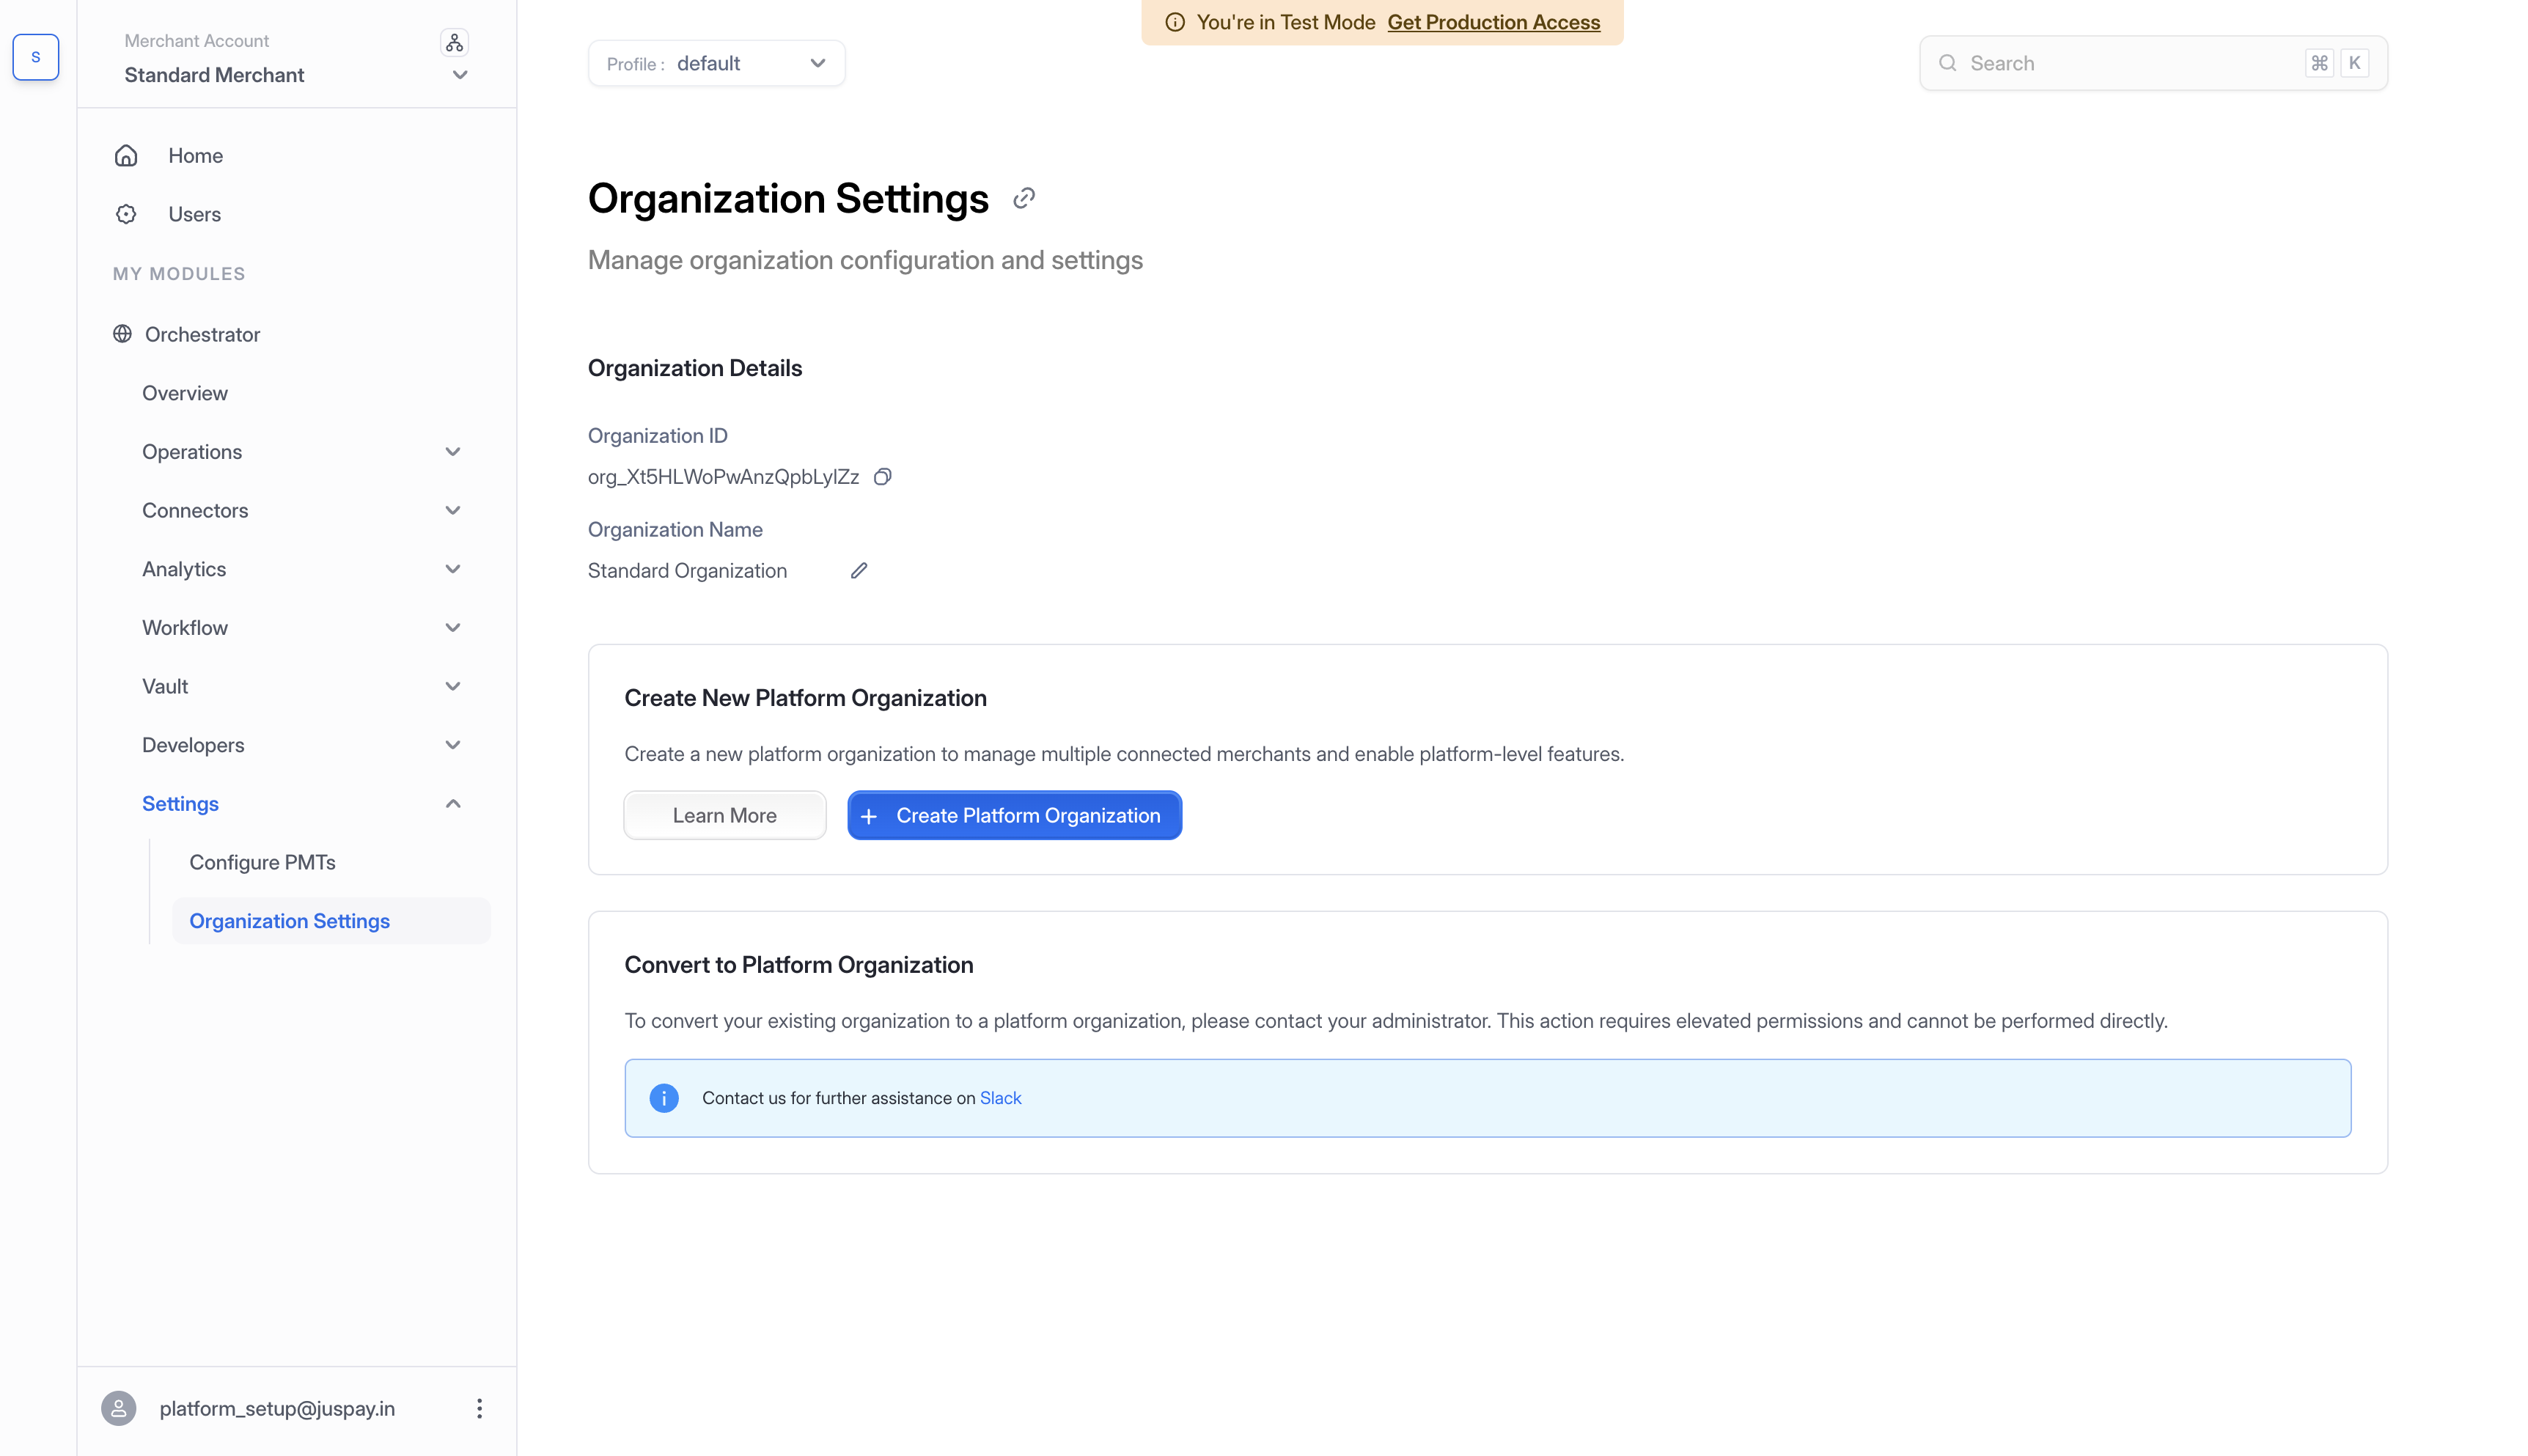
1. Navigate to Organization Settings

From the sidebar, expand Settings and click Organization Settings. The page displays your current Organization Details, including your Organization ID and Organization Name (e.g., "Standard Organization"). Below that, the Create New Platform Organization section provides two options: Learn More and + Create Platform Organization. At the bottom, the Convert to Platform Organization section notes that converting an existing organization requires contacting your administrator.

Click the + Create Platform Organization button to begin.

Organization Settings page showing Organization Details, Create New Platform Organization section, and Convert to Platform Organization notice
Organization Settings page - click "+ Create Platform Organization" to begin
2. Name Your Platform Organization

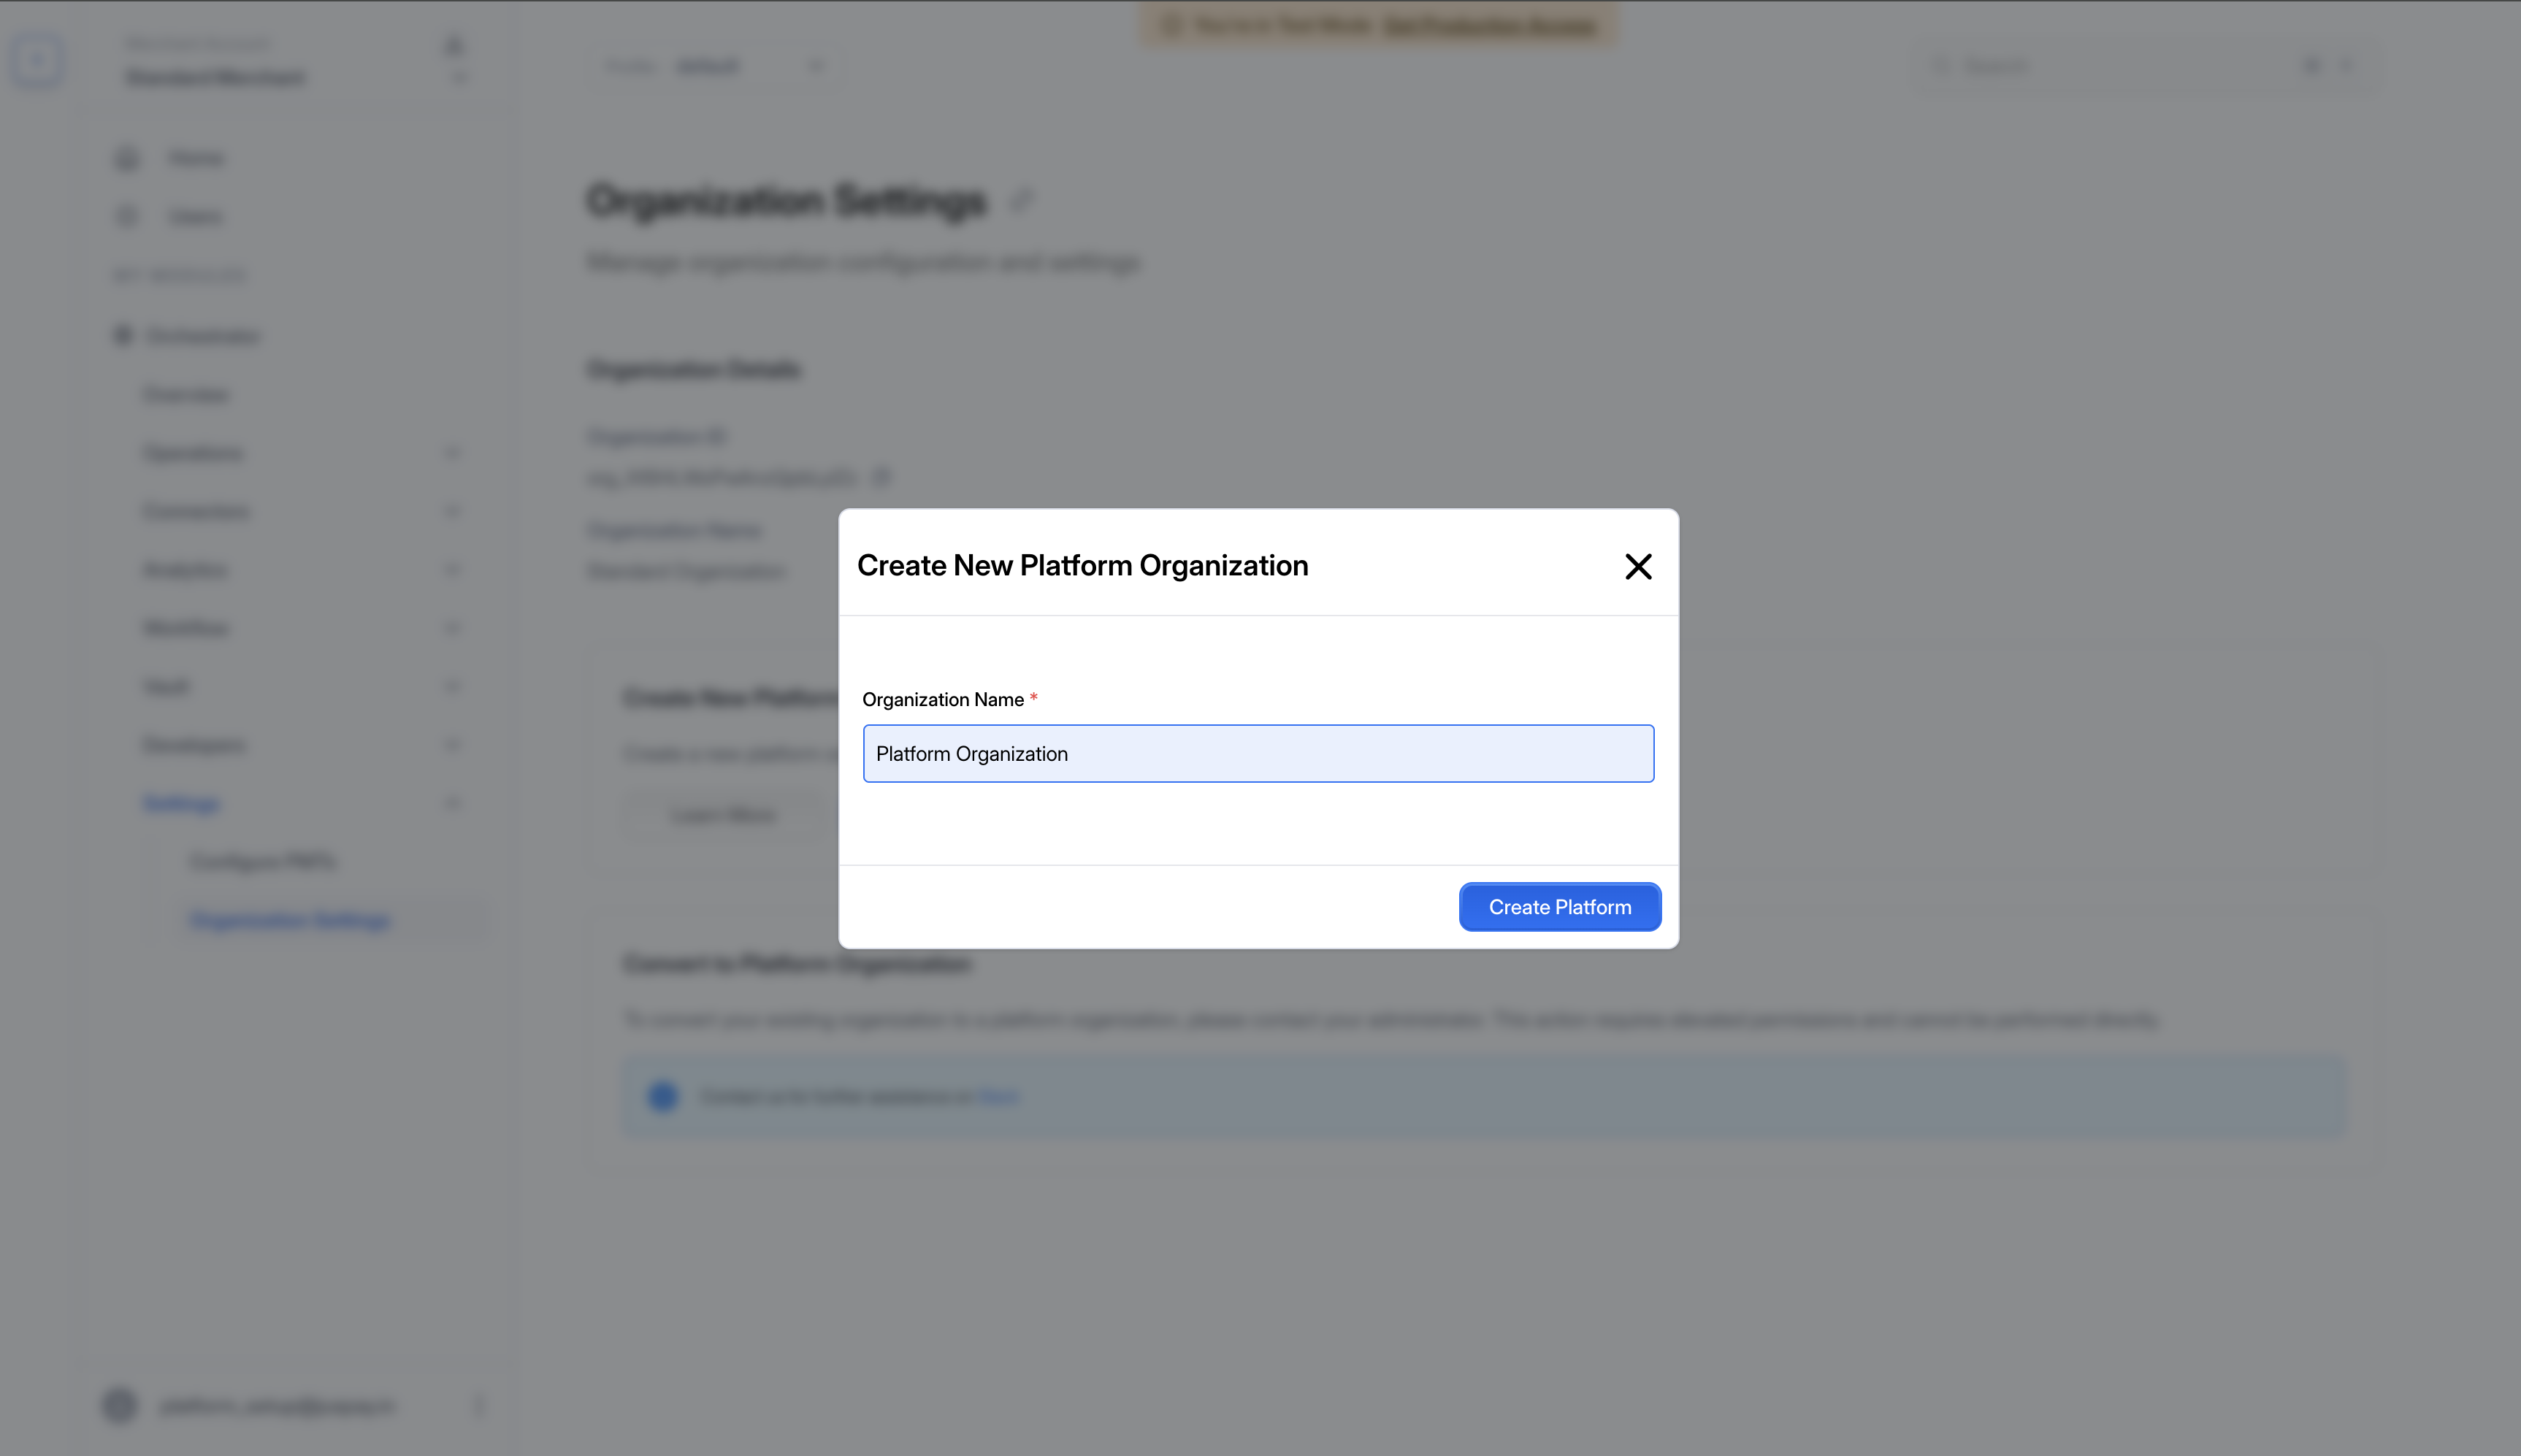
A modal titled "Create New Platform Organization" appears with a single required field. Enter your desired name in the Organization Name field (e.g., "Platform Organization") and click the Create Platform button.

Create New Platform Organization modal with Organization Name field and Create Platform button
Enter a name for your Platform Organization and click "Create Platform"
3. Verify the Platform Organization

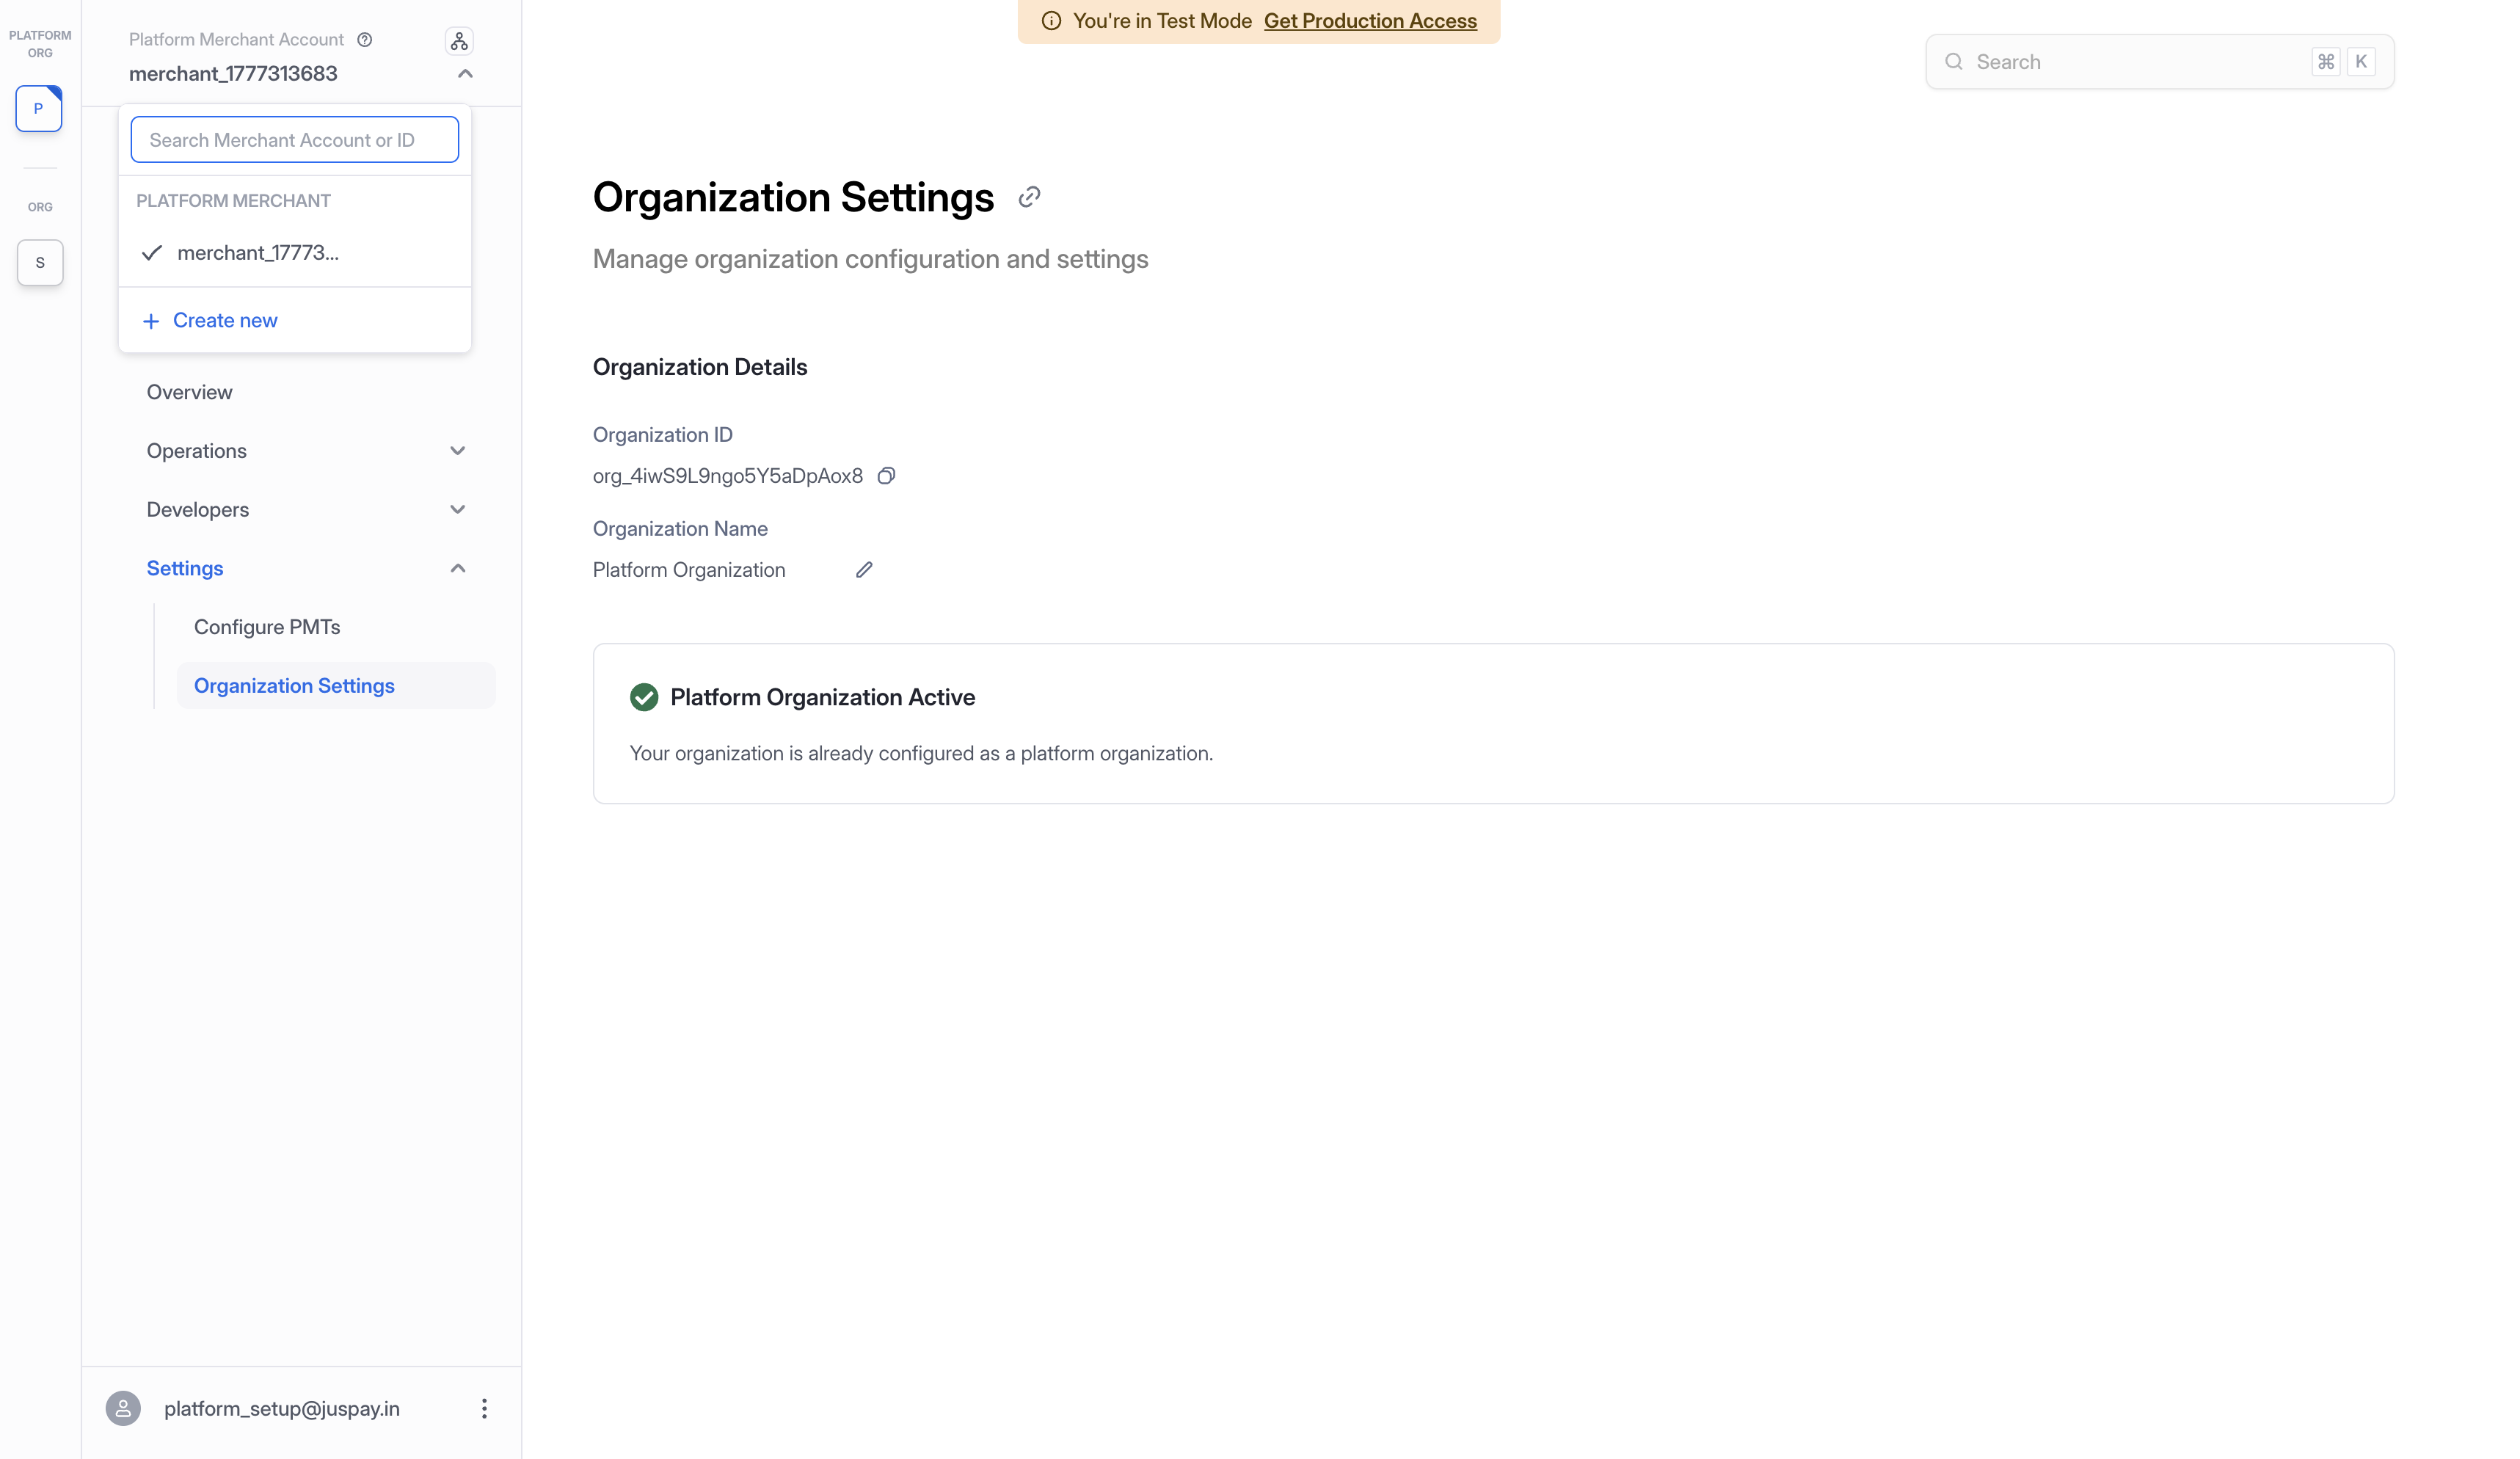
After creation, the dashboard automatically switches to your new Platform Organization. The Organization Name now reflects the name you entered. A green checkmark with "Platform Organization Active" and the message "Your organization is already configured as a platform organization." confirms the setup is complete. The sidebar updates to show "Platform Merchant Account" at the top with the merchant ID. Notice that the Platform Merchant is already present in the sidebar under the PLATFORM MERCHANT section - this is the default merchant that was automatically created with the Platform Organization. A + Create new option is also available to add Connected or Standard Merchants.

Organization Settings showing Platform Organization Active with green checkmark and updated sidebar with Platform Merchant
Platform Organization is now active with the Platform Merchant visible in the sidebar
To convert your existing organization to a platform organization, please contact your administrator. This action requires elevated permissions and cannot be performed directly. Contact us for further assistance on Slack, via Contact Us, or email us at [email protected].


Creating Merchants

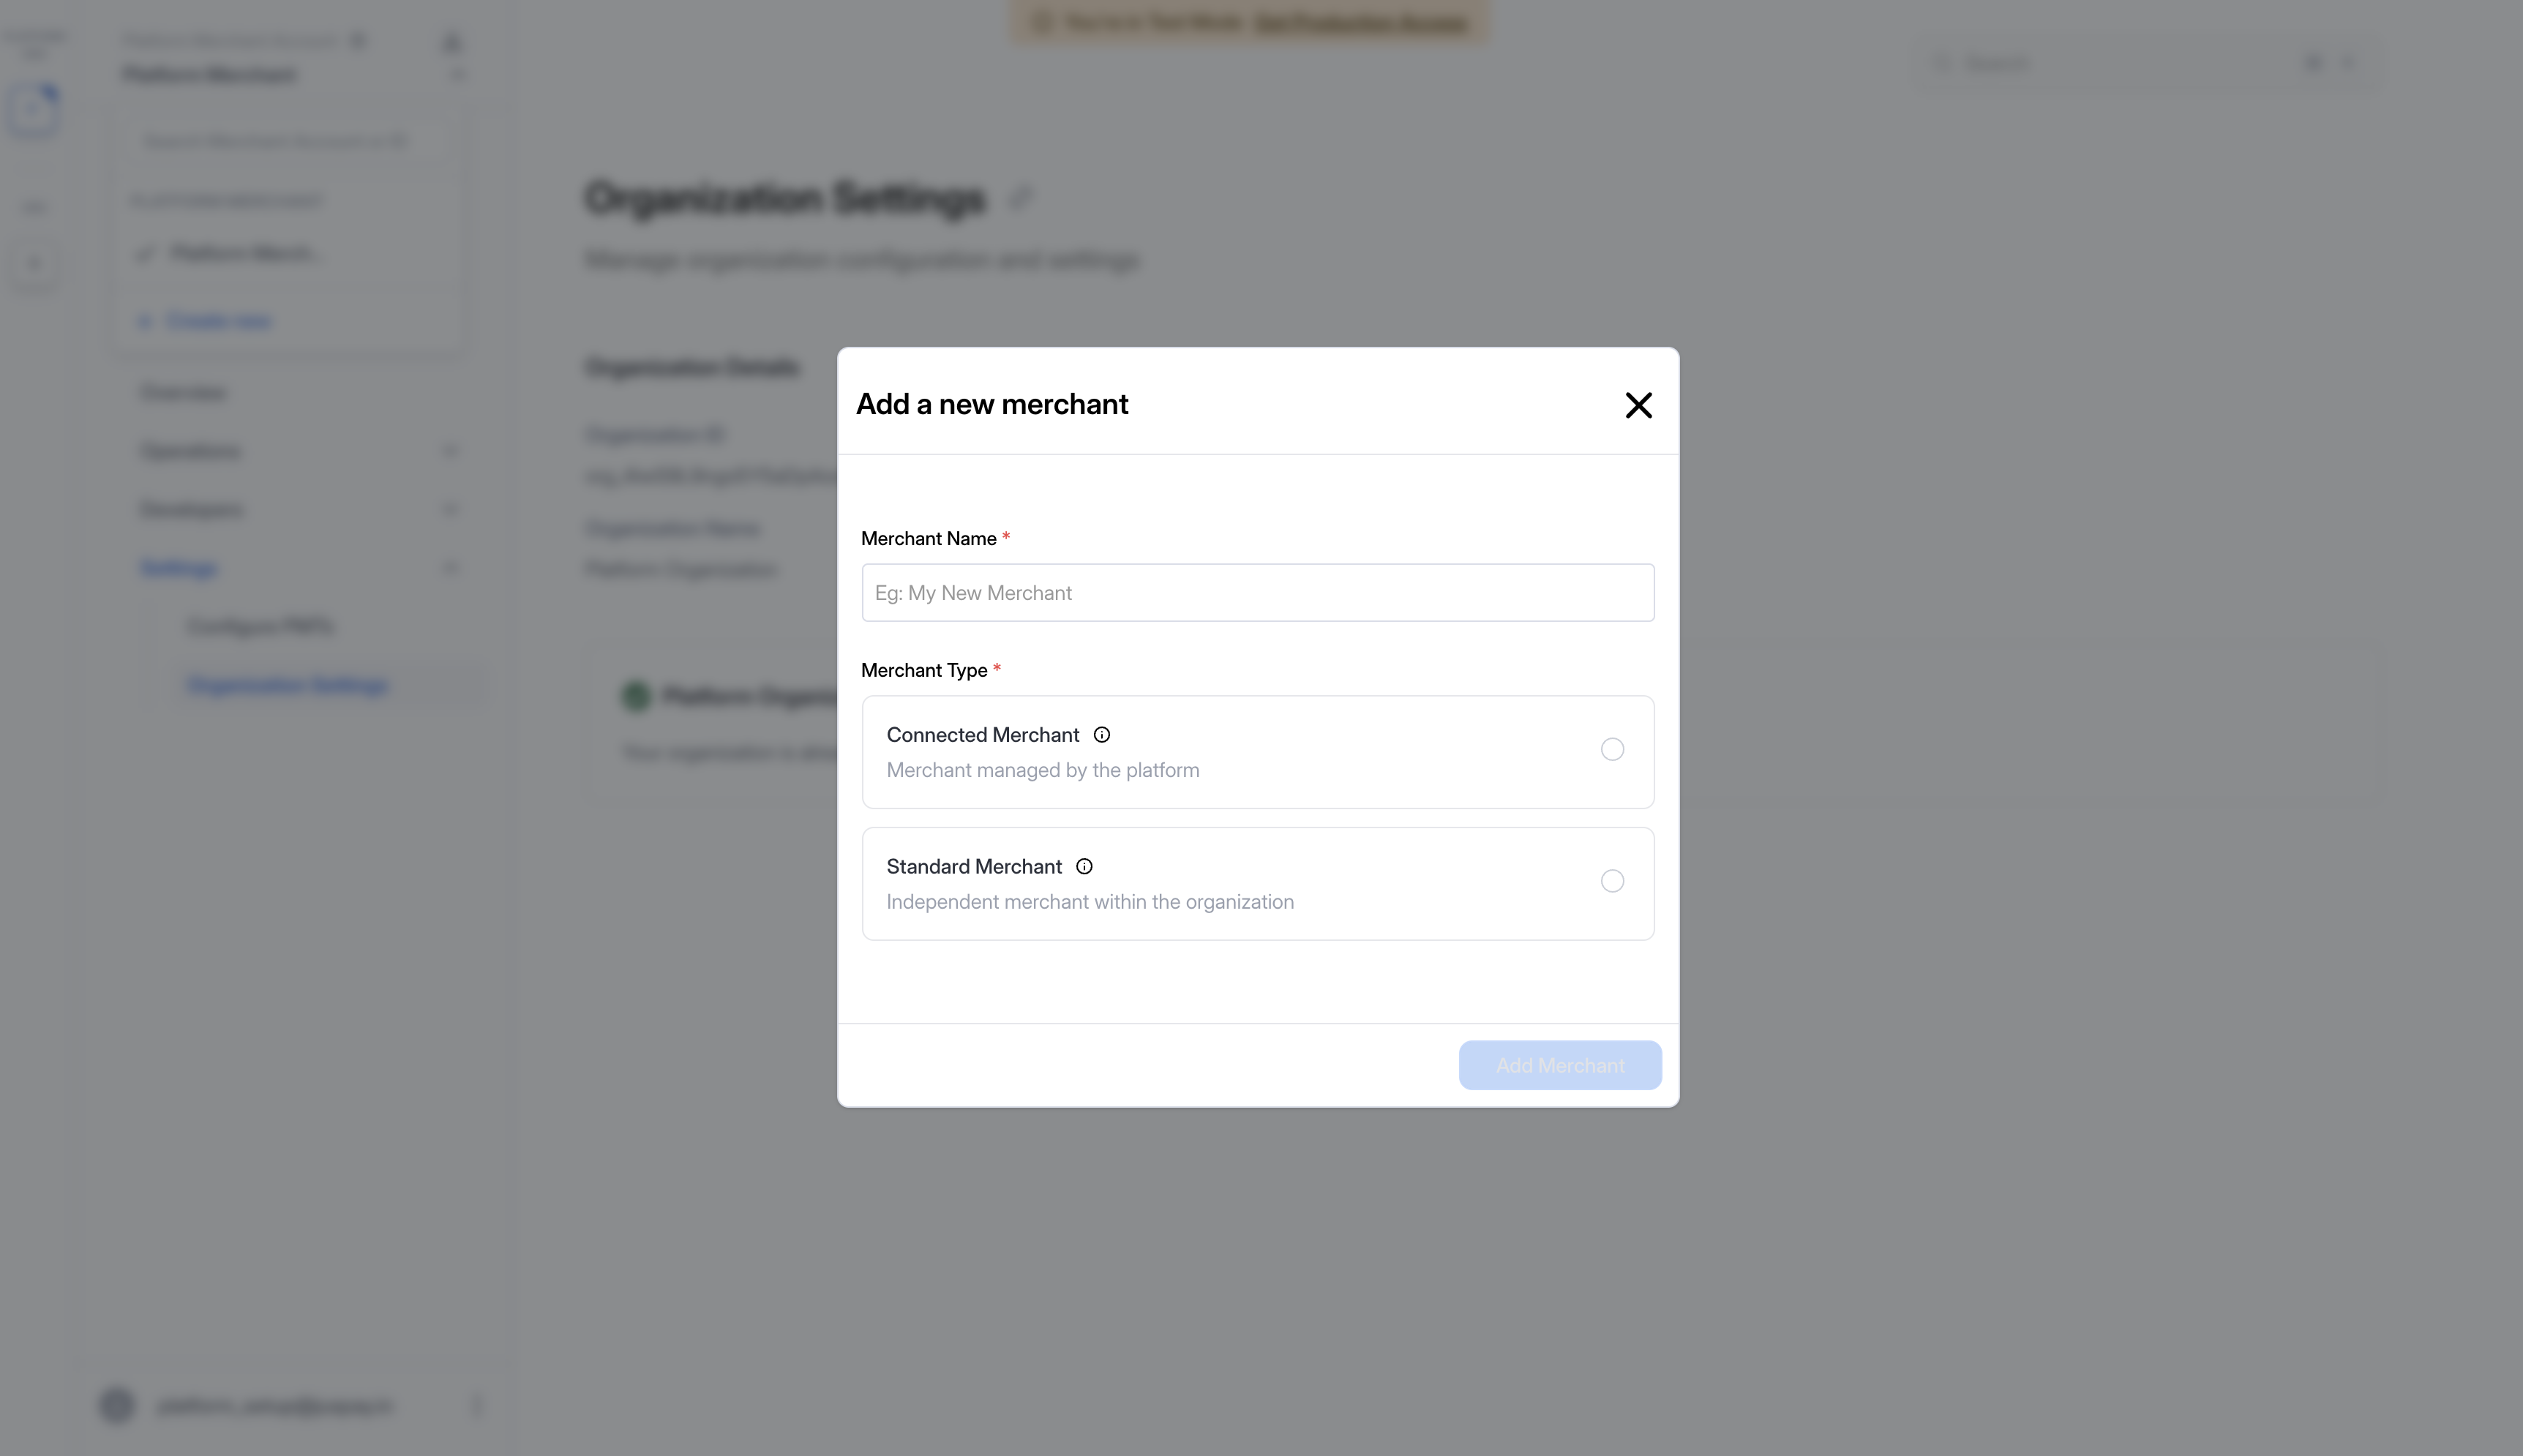
Once your Platform Organization is active, you can add merchants from the sidebar. Click the merchant dropdown in the top-left corner and select + Create new. A modal titled "Add a new merchant" will appear with two fields:

  • Merchant Name - Enter any name for your new merchant. The names used below (e.g., "Connected Merchant", "Standard Merchant") are just examples for clarity.

  • Merchant Type - Choose between:

    • Connected Merchant - Merchant managed by the platform (shares Customers and Payment Methods).

    • Standard Merchant - Independent merchant within the organization (isolated resources).

Add a new merchant modal showing Merchant Name and Merchant Type options
"Add a new merchant" modal with Merchant Type selection
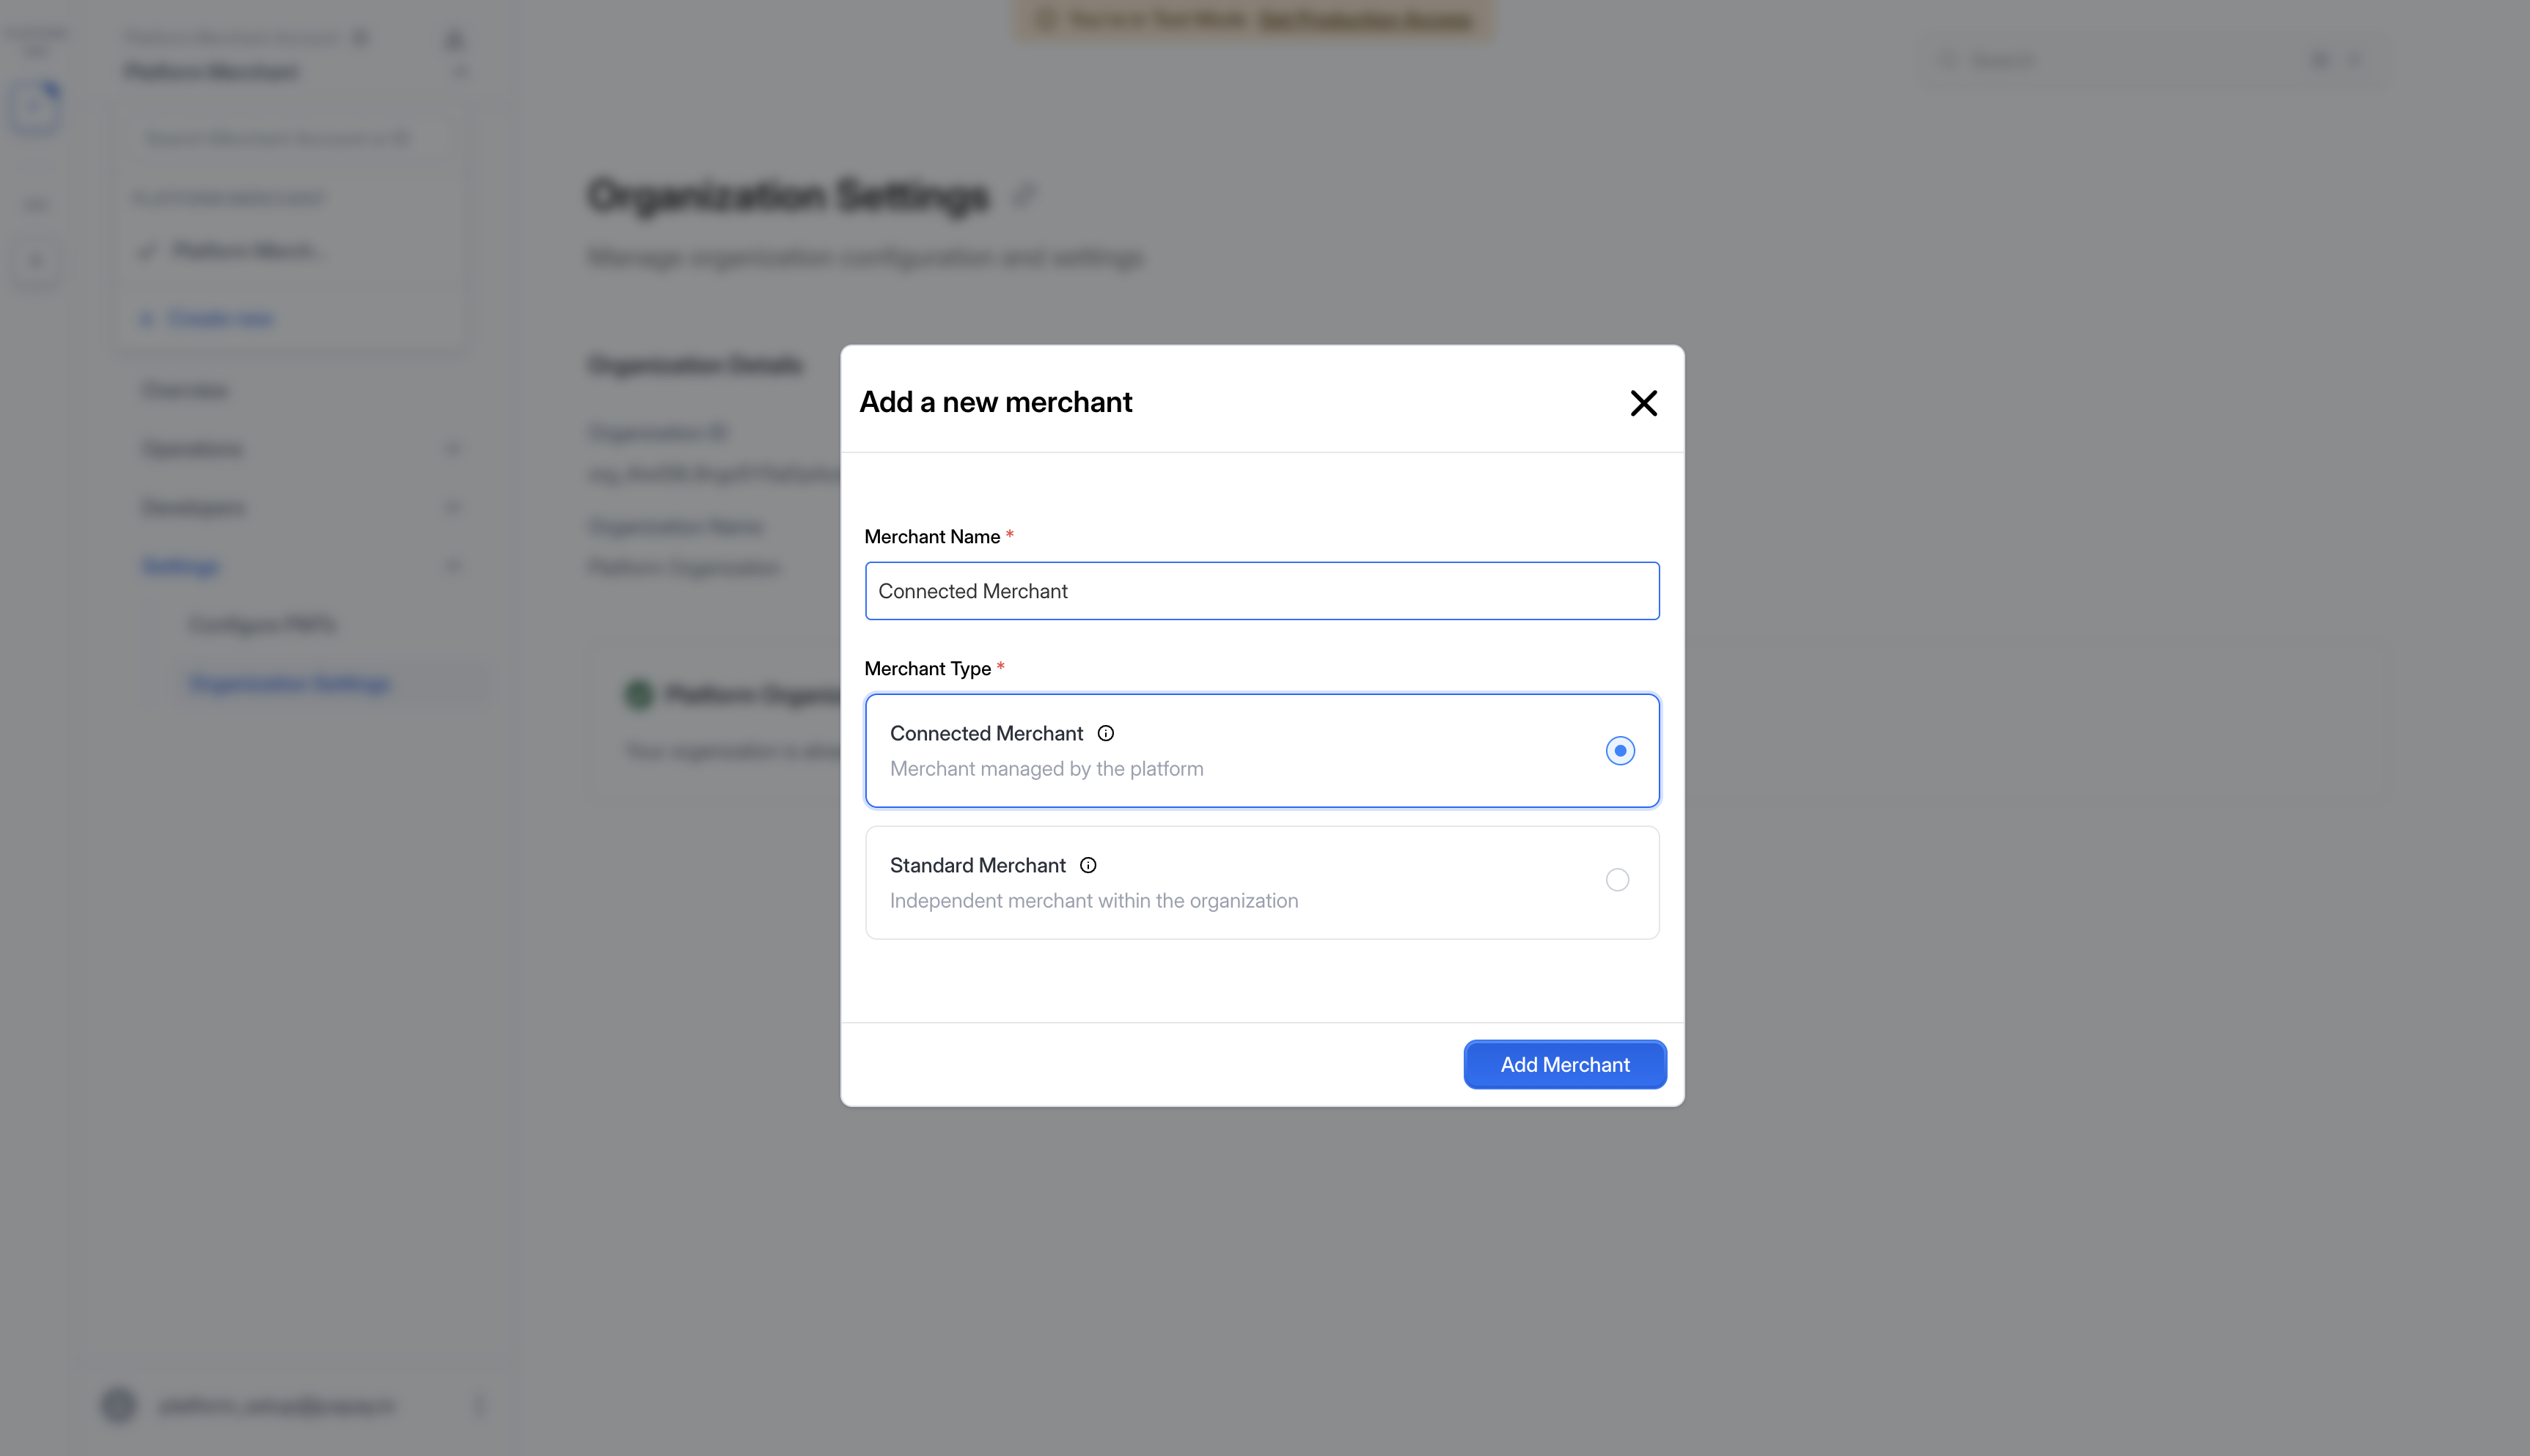
Creating a Connected Merchant

  • Enter the merchant name in the Merchant Name field (e.g., "Connected Merchant").

  • Select Connected Merchant as the Merchant Type.

  • Click the Add Merchant button.

Add merchant modal with Connected Merchant name entered and Connected Merchant type selected
Merchant name entered and Connected Merchant type selected

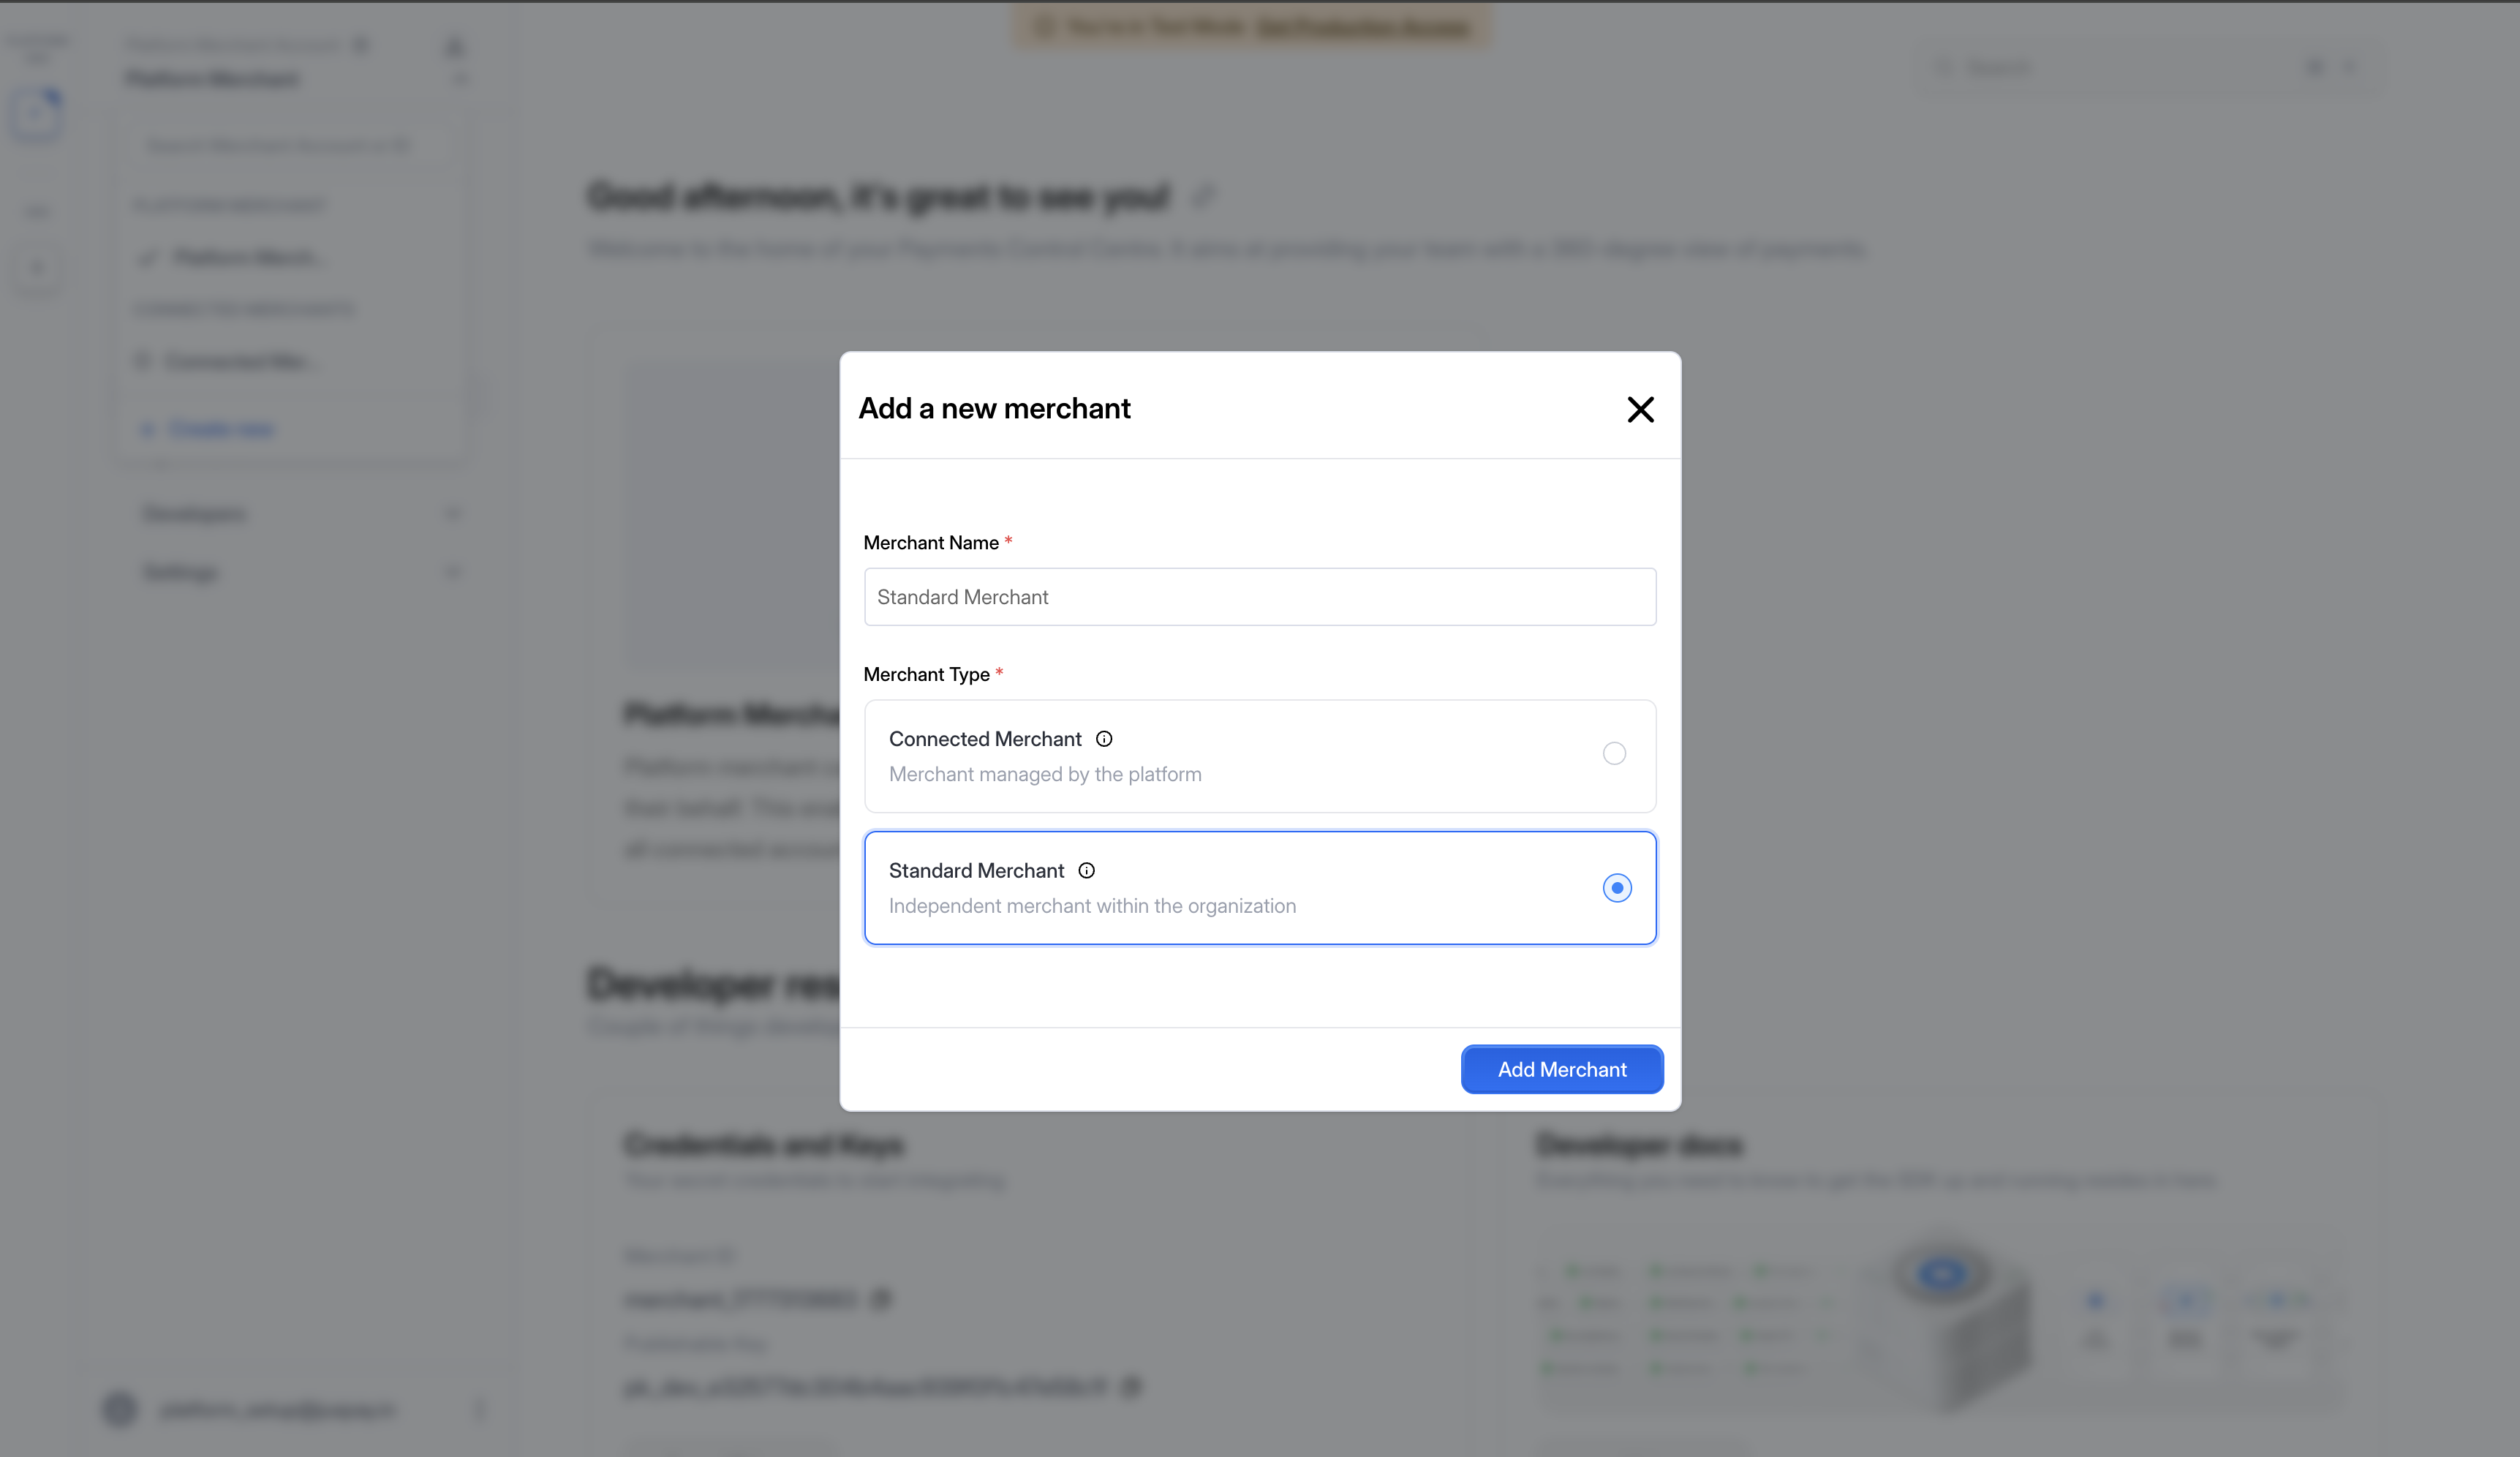
Creating a Standard Merchant

  • Enter the merchant name in the Merchant Name field (e.g., "Standard Merchant").

  • Select Standard Merchant as the Merchant Type.

  • Click the Add Merchant button.

Add merchant modal with Standard Merchant name entered and Standard Merchant type selected
Merchant name entered and Standard Merchant type selected

Verify Your Merchants

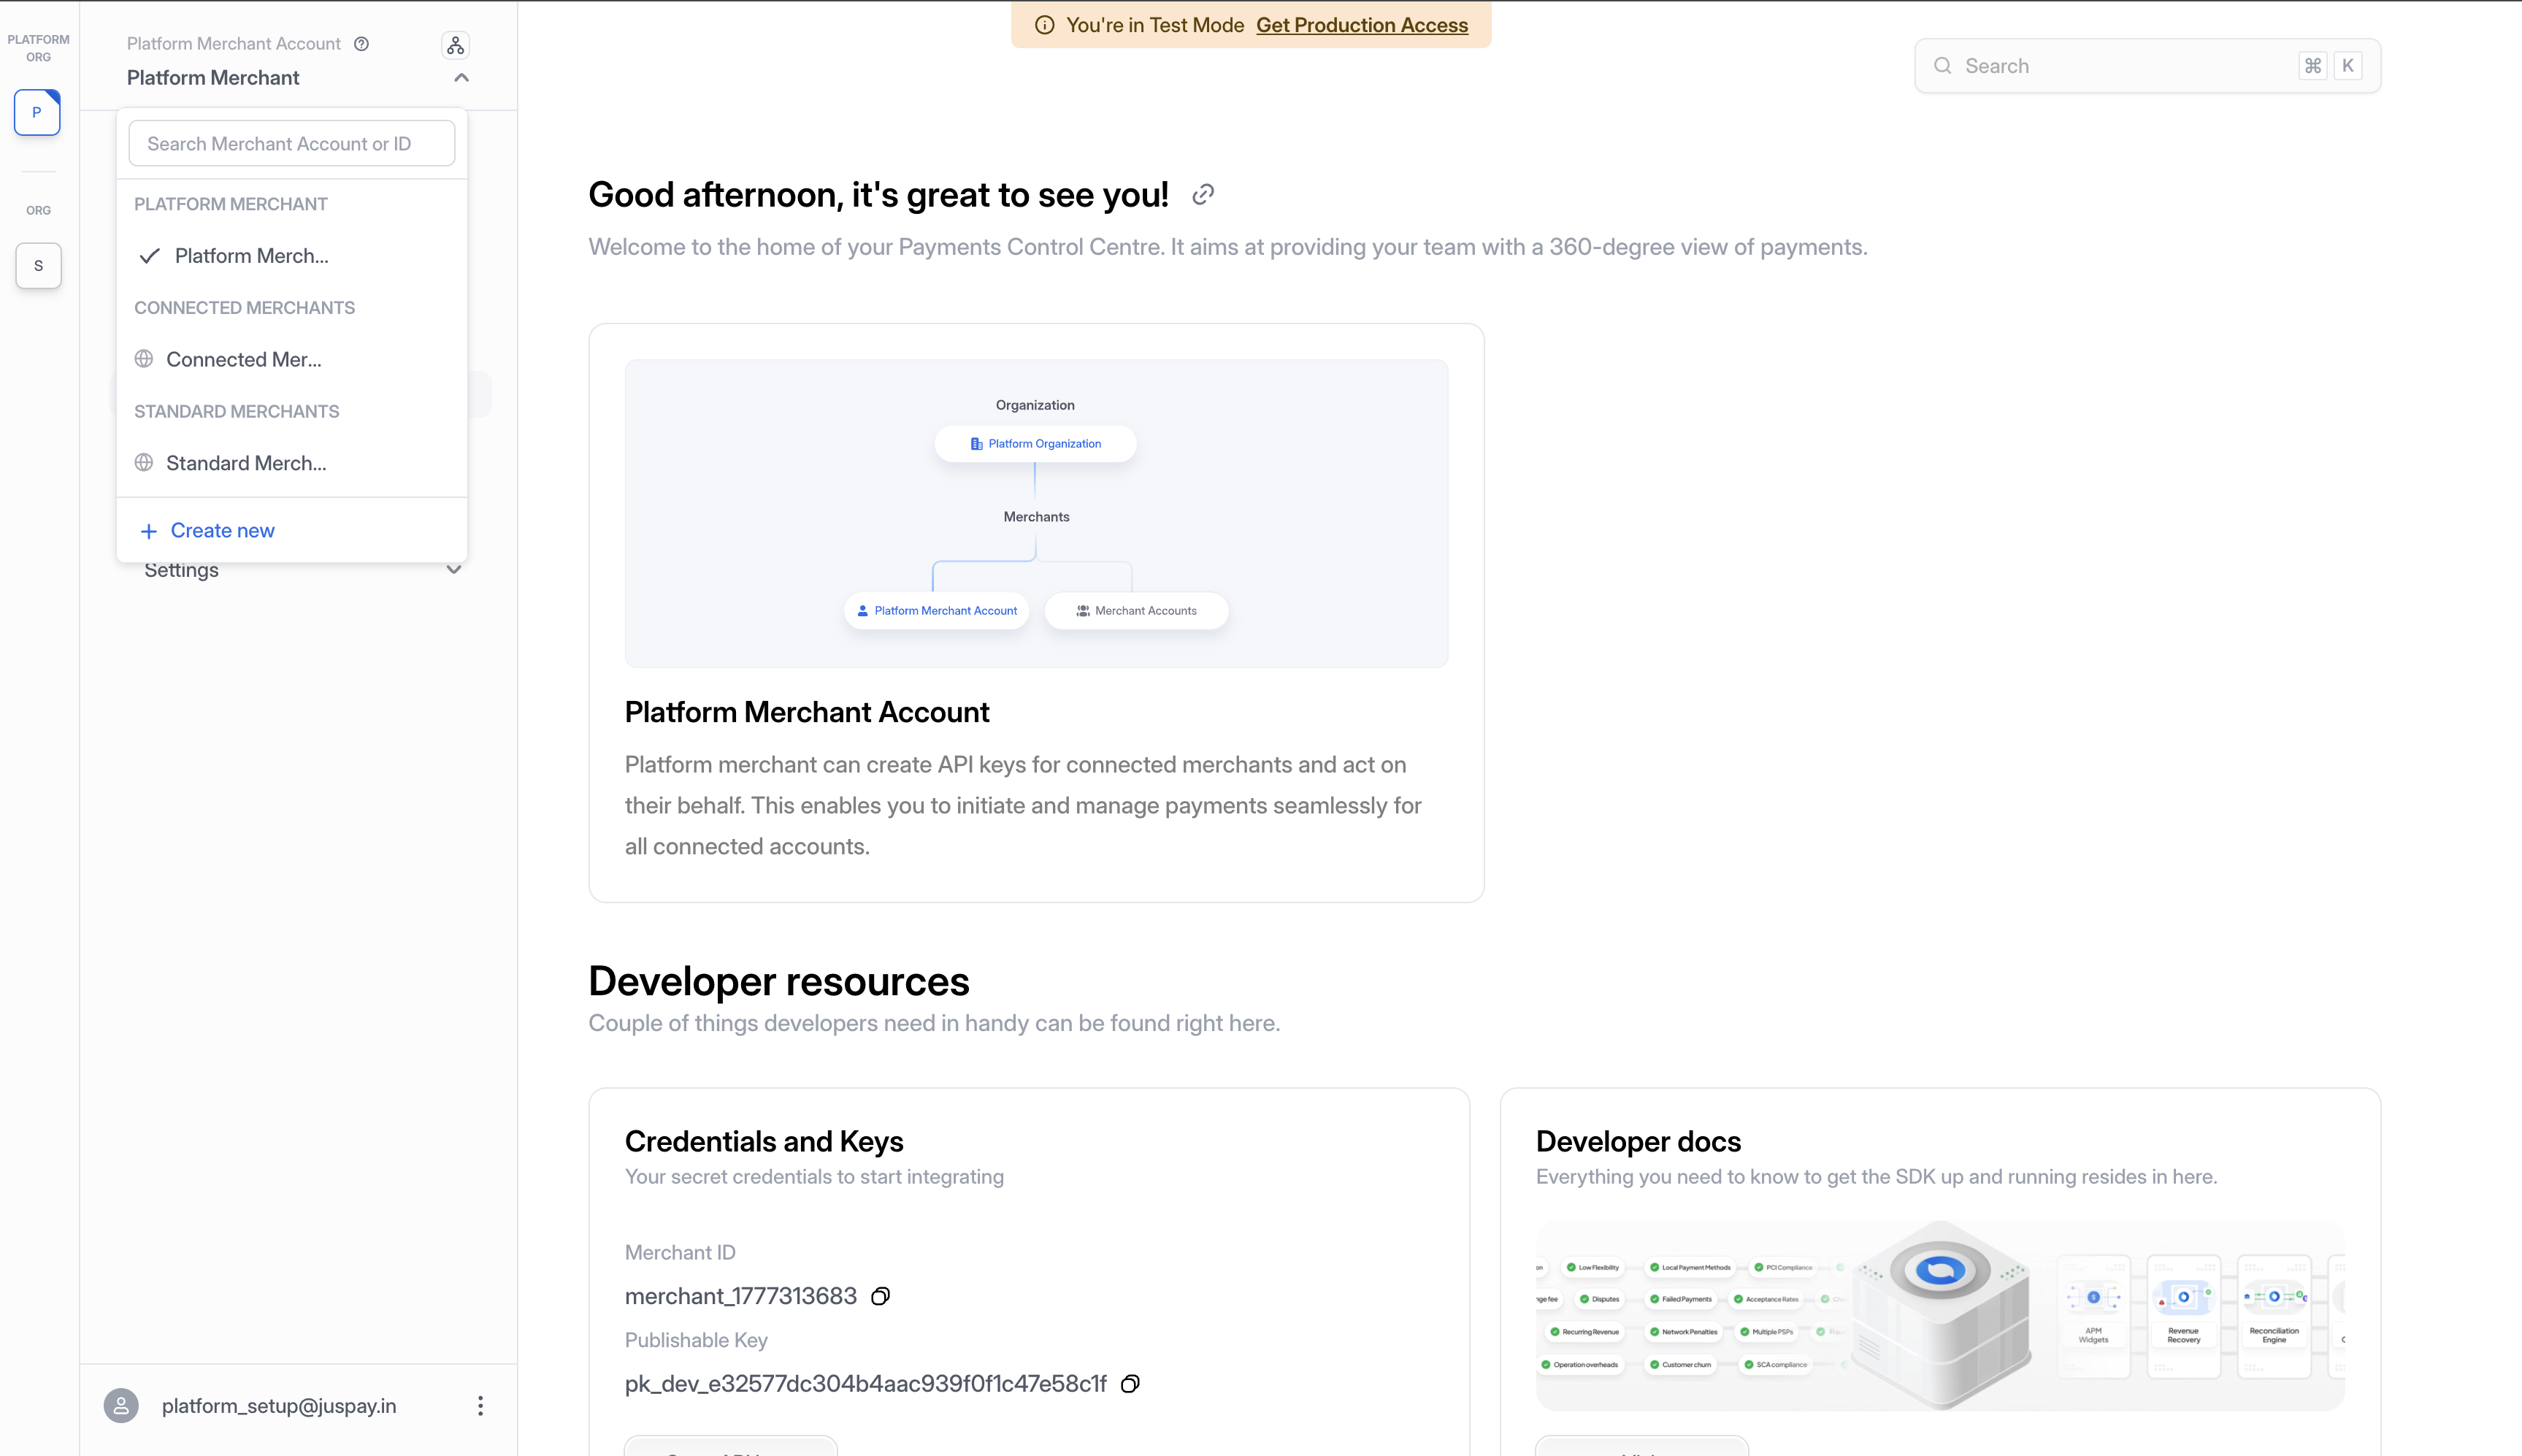
After creating both merchants, the sidebar displays all merchant types under their respective sections:

  • PLATFORM MERCHANT - The default Platform Merchant (automatically created).

  • CONNECTED MERCHANTS - Connected Merchants managed by the platform.

  • STANDARD MERCHANTS - Independent merchants with isolated resources.

Sidebar showing Platform Merchant, Connected Merchants, and Standard Merchants sections
All merchant types visible in the sidebar: Platform, Connected, and Standard

What's Next?

Once your Platform Organization is set up, you can proceed with:

For the full Platform Organization workflow and API details, refer to:

Platform Organization

Last updated

Was this helpful?